Join Slack
Provisioning Netris SoftGate nodes in phoenixNAP BMC
For SoftGate nodes you can start with two s2.c1.small or larger servers. In the future, if you happen to need to upgrade to high-performance SoftGate PRO (with DPDK acceleration), you can upgrade the servers one-by-one.
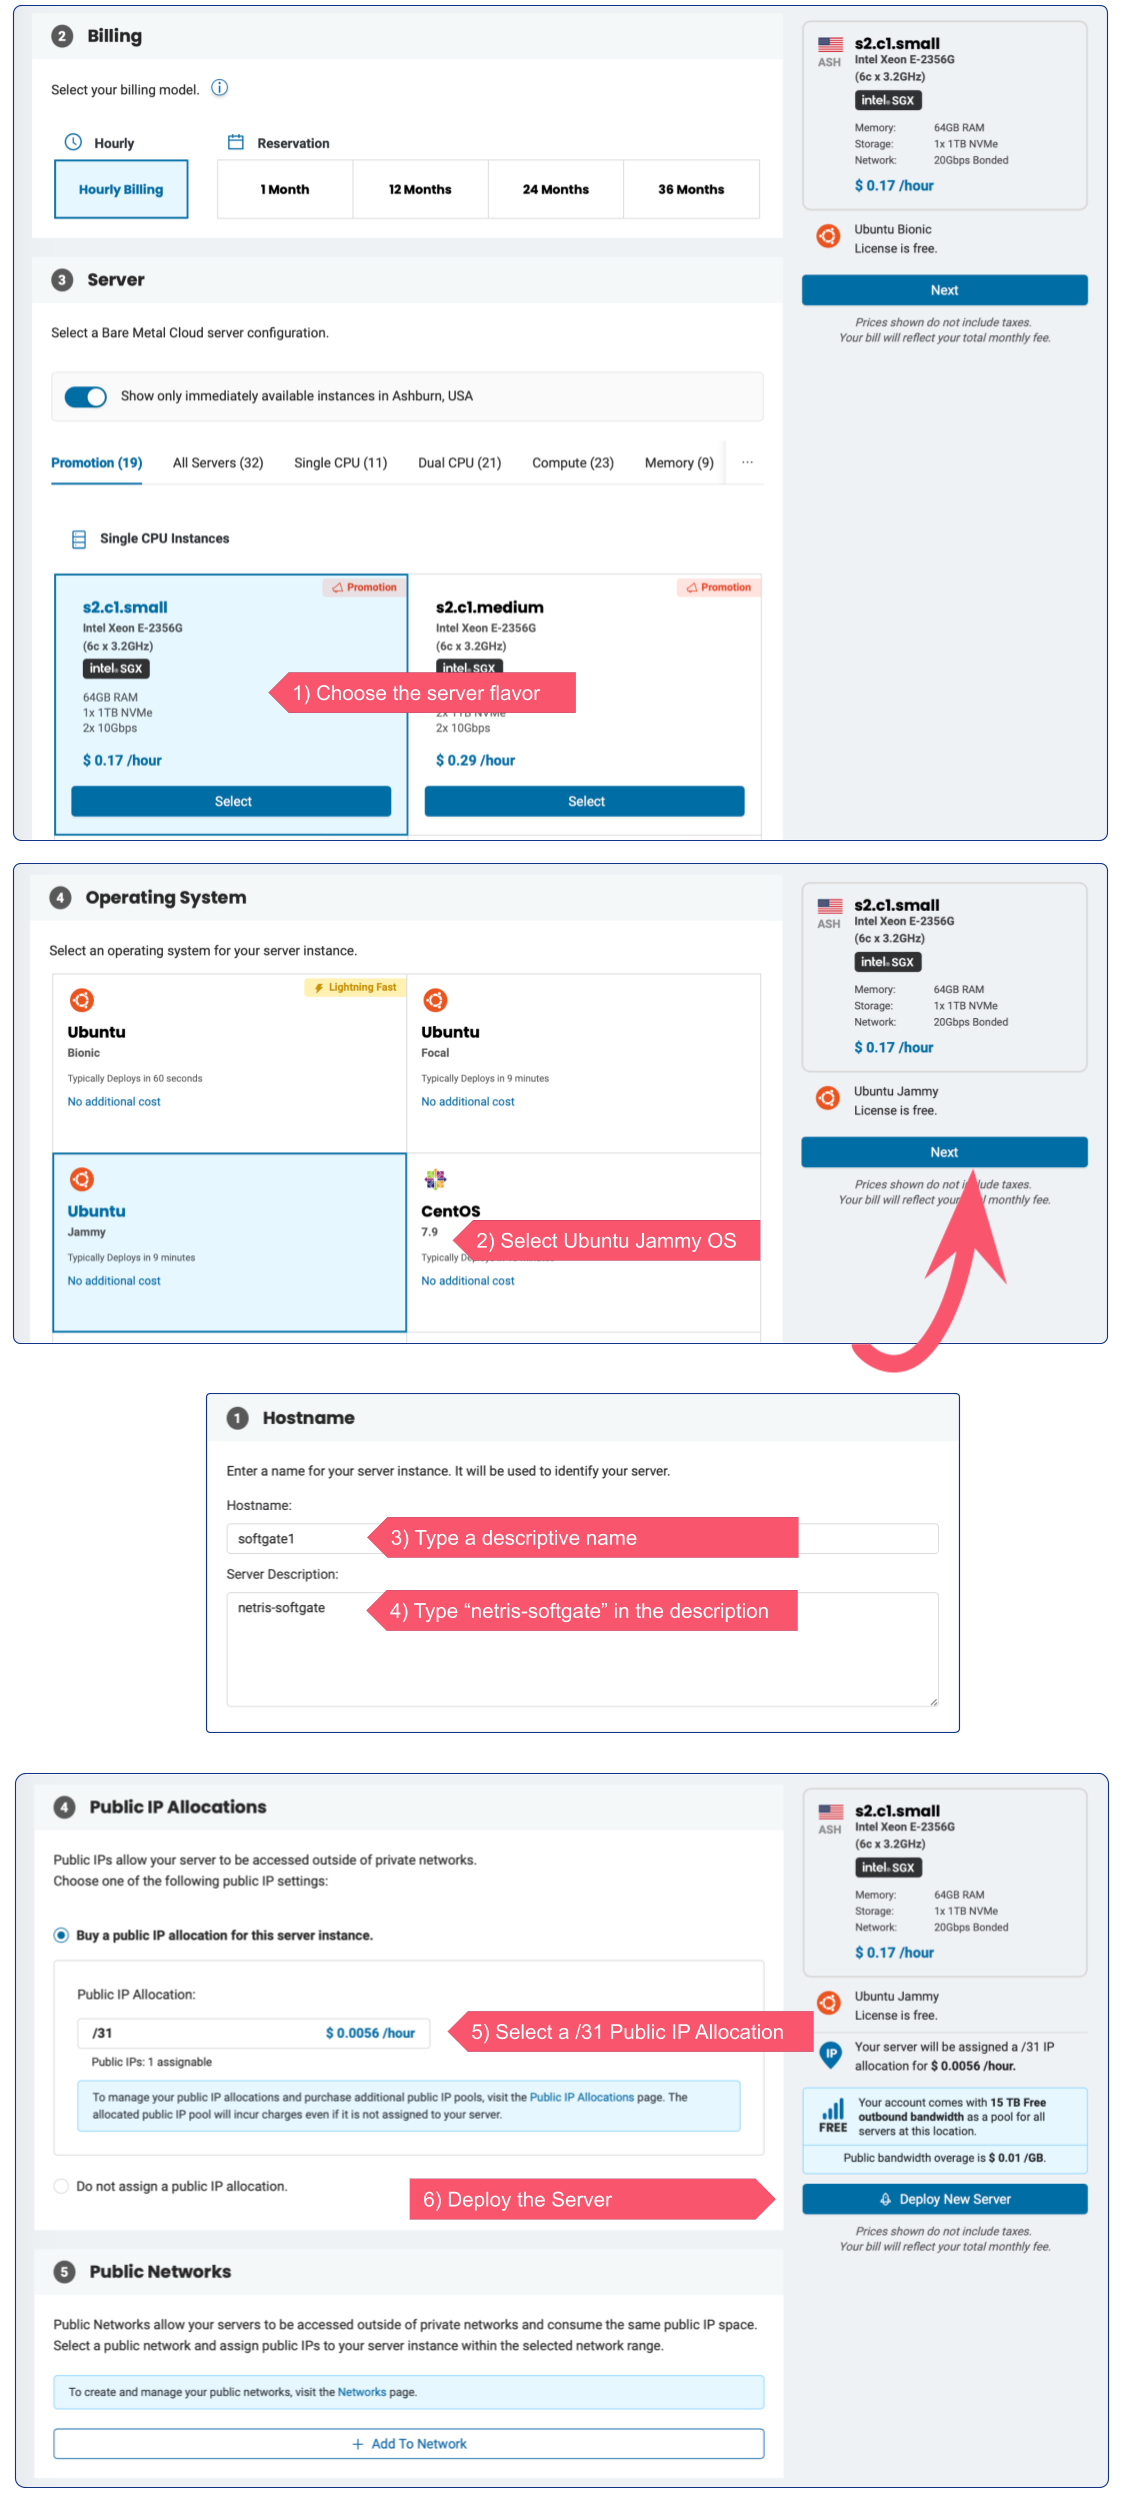
1) Request two servers (s2.c1.small) from phoenixNAP BMC with Ubuntu Jammy OS, type netris-softgate in the “Server Description” field,
choose a /31 Public IP Allocation and wait until provisioned.
Note
It’s required to type the netris-softgate in the description. This signals Netris Controller that those are not regular bare-metal servers, and they should be synced with the type of SoftGate.
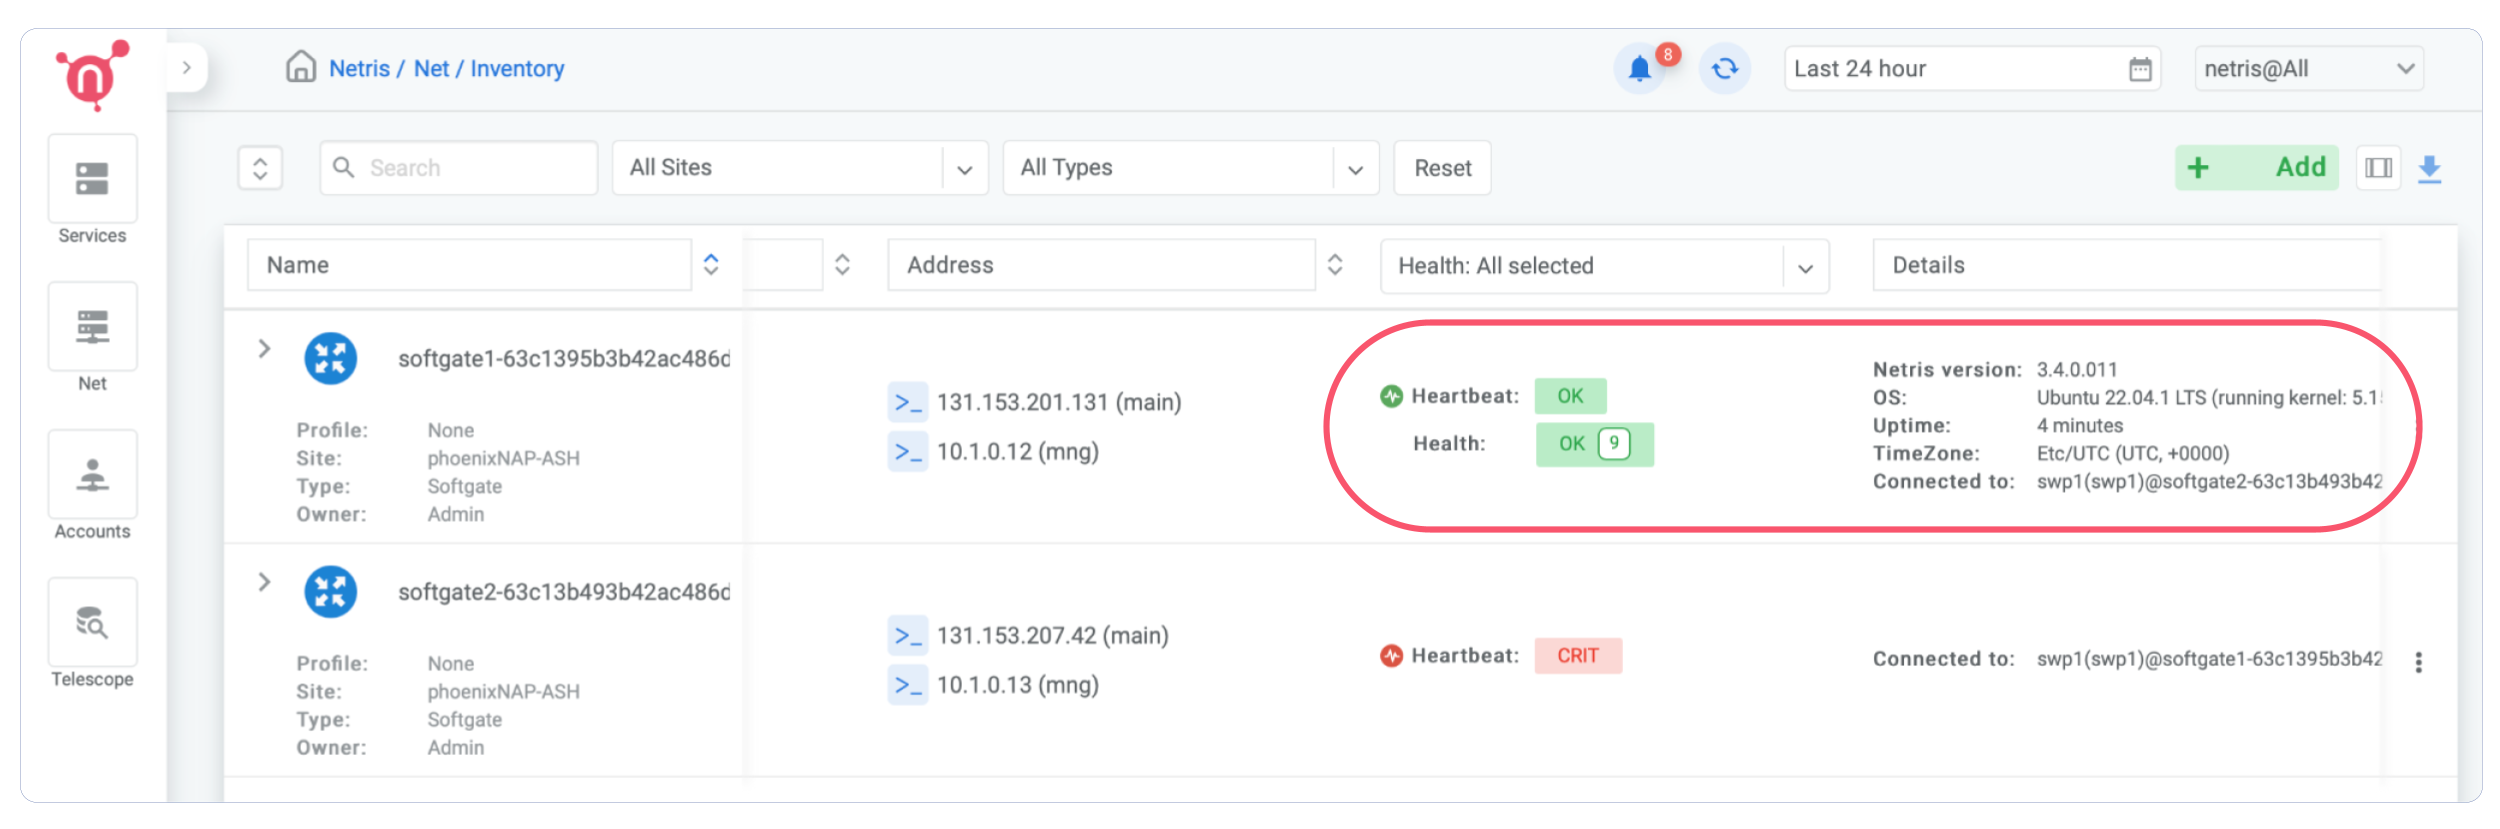
2) At this point you should see Netris Controller listing newly created servers as “Softgate Softgate1(2)” under Netris Web Console → Net → Inventory. You will also notice IP addresses listed per SoftGate, and Heartbeat: CRIT. We will bring Heartbeat to OK in next step.
3) Provision SoftGate nodes. Netris Controller provides a one-liner command for provisioning SoftGate nodes. Go to Netris web console → Net → Inventory, click on the 3 dots menu, and click “Install Agent”, and copy the one-liner command.
Then SSH to the corresponding SoftGate server with the ubuntu user and paste the one-liner there.
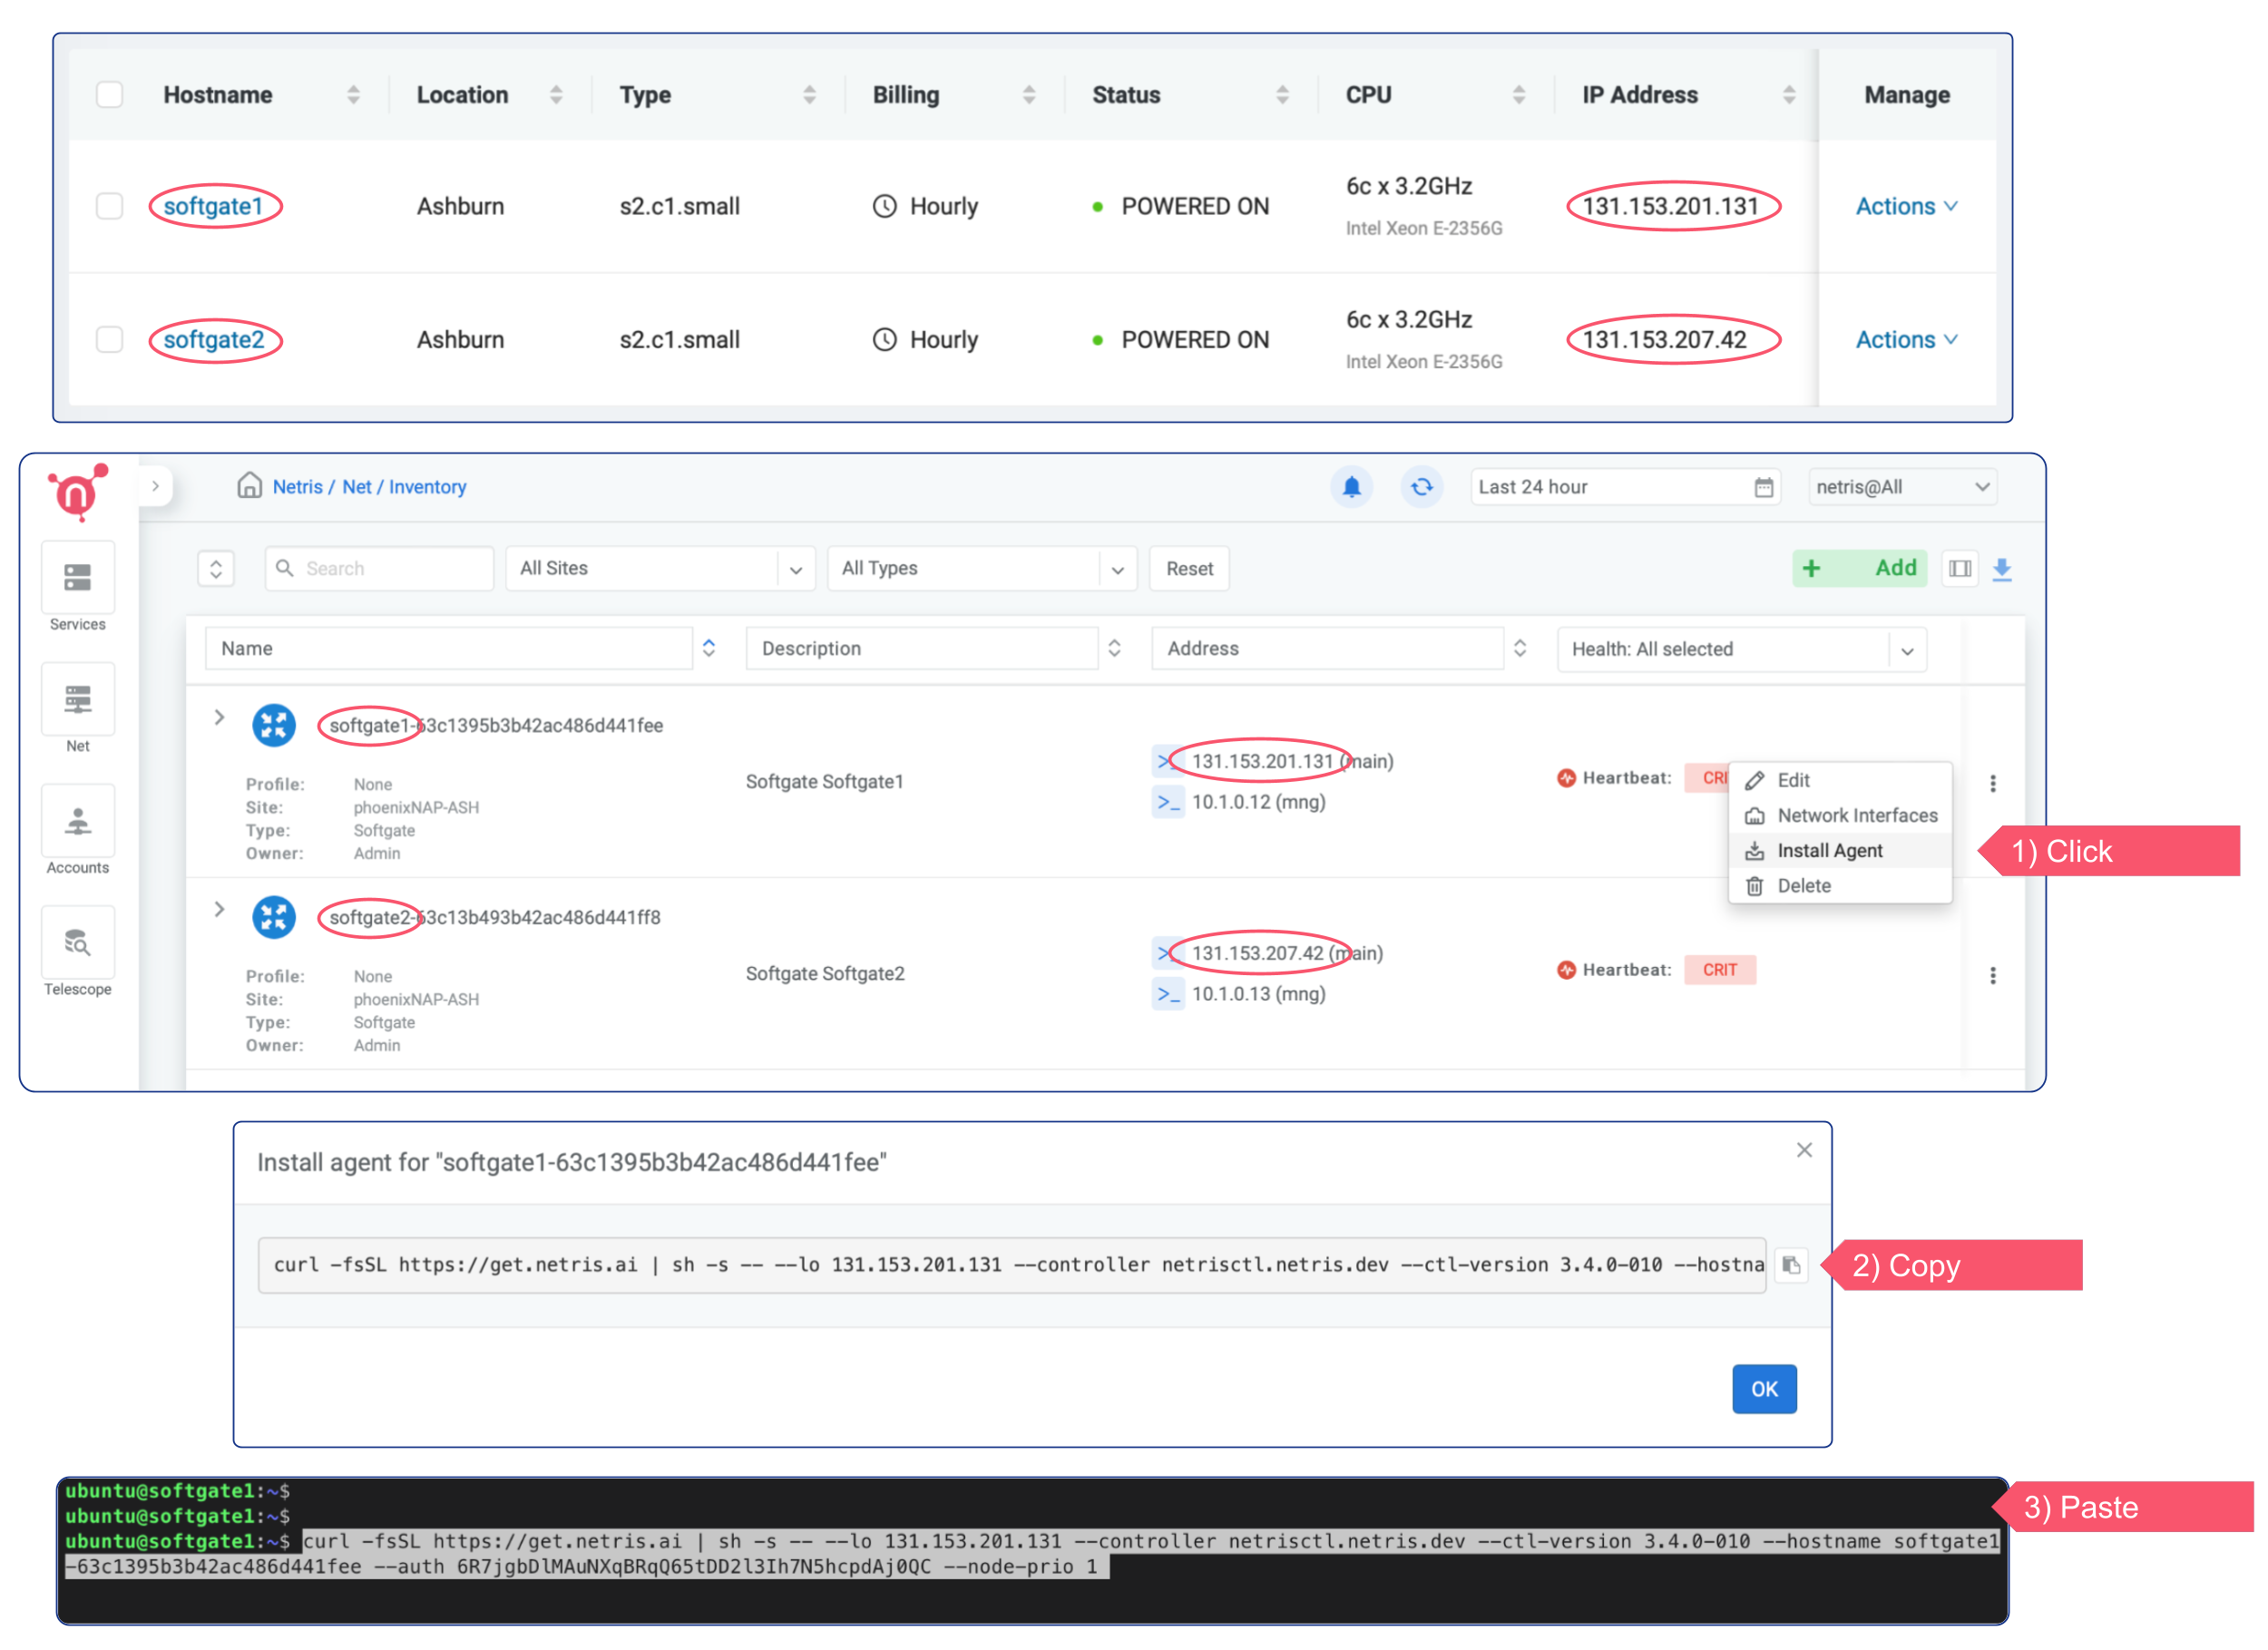
When provisioning is done, reboot the server. In a few minutes Netris Controller should sense the heart beats from SoftGate as in the below screenshot. Repeat for the second SoftGate too.