Upgrade and Rollback
Netris upgrade Procedure
Backup current database
SSH to the host running the Netris Controller and execute below command.
kubectl -n netris-controller exec -it netris-controller-mariadb-0 -- bash -c 'mysqldump -u $MARIADB_USER -p${MARIADB_PASSWORD} $MARIADB_DATABASE' > db-snapshot.sql
Ensure that SQL file db-snapshot.sql is generated and present in the current directory.
Note
An SQL dump is enough for this basic upgrade scenario, however detailed backup & restore procedure is described in here.
Stop Netris Agents
Stop Netris agents on switches and SoftGate nodes.
For Switches:
SSH to the switch and run the following command:
sudo systemctl stop netris-sw
For SoftGate nodes:
SSH to the SoftGate and run the following command:
sudo systemctl stop netris-sg
Make sure that all devices in the Network → Inventory section are “red” with the “check_agent” status being “Agent is unavailable”.
Note
A stopped Netris agent has no impact on production traffic through the device.
Check your current version
Before upgrading the Netris Controller, take a note of the “Netris Version” by navigating to Settings → General in the Controller web interface. The current version number may be used in case of the hypothetical need to perform a rollback procedure.

Upgrade the Controller
SSH to the Controller host and execute the below command.
curl -sfL https://get.netris.io | sh -
Note
This process can take up to 5 minutes
Afterwards, make sure that all pods have either “Running” or “Completed” status by executing the following command:
kubectl -n netris-controller get pods
The output is similar to this:
NAME                                                      READY   STATUS      RESTARTS    AGE
svclb-netris-controller-haproxy-6tkgj                     4/4     Running     0           38d
netris-controller-haproxy-bcb944b7c-qcbf8                 1/1     Running     0           13d
netris-controller-squid-7f6fdc6cf9-7fdx8                  1/1     Running     0           38d
svclb-netris-controller-squid-58rnp                       1/1     Running     0           38d
netris-controller-graphite-0                              1/1     Running     0           38d
netris-controller-mongodb-0                               1/1     Running     0           38d
netris-controller-redis-master-0                          1/1     Running     0           38d
netris-controller-smtp-76778cf85f-lw5v5                   1/1     Running     0           10d
netris-controller-mariadb-0                               1/1     Running     0           10d
netris-controller-web-session-generator-8b9dbbcd8-8snhd   1/1     Running     0           10d
netris-controller-telescope-notifier-647975848f-fs5dn     1/1     Running     0           10d
netris-controller-app-b9b8d8f8d-4ssqb                     1/1     Running     0           10d
netris-controller-grpc-987669fb9-jjskp                    1/1     Running     0           10d
netris-controller-telescope-777c98c5d9-mqwl6              1/1     Running     0           10d
helm-install-netris-controller-lqmq7                      0/1     Completed   0           20h
Warning
If, after 5 minutes, you see pods with a status other than “Running” or “Completed”, please reach out to us via Slack.
Check the upgraded version
Make sure that the “Netris Version” reflects the version change by navigating to Settings → General in the Controller web interface.
Upgrade Switches and SoftGate nodes
Once you have verified that the Netris controller is up-to-date, it is time to update the switch and SoftGate agents.
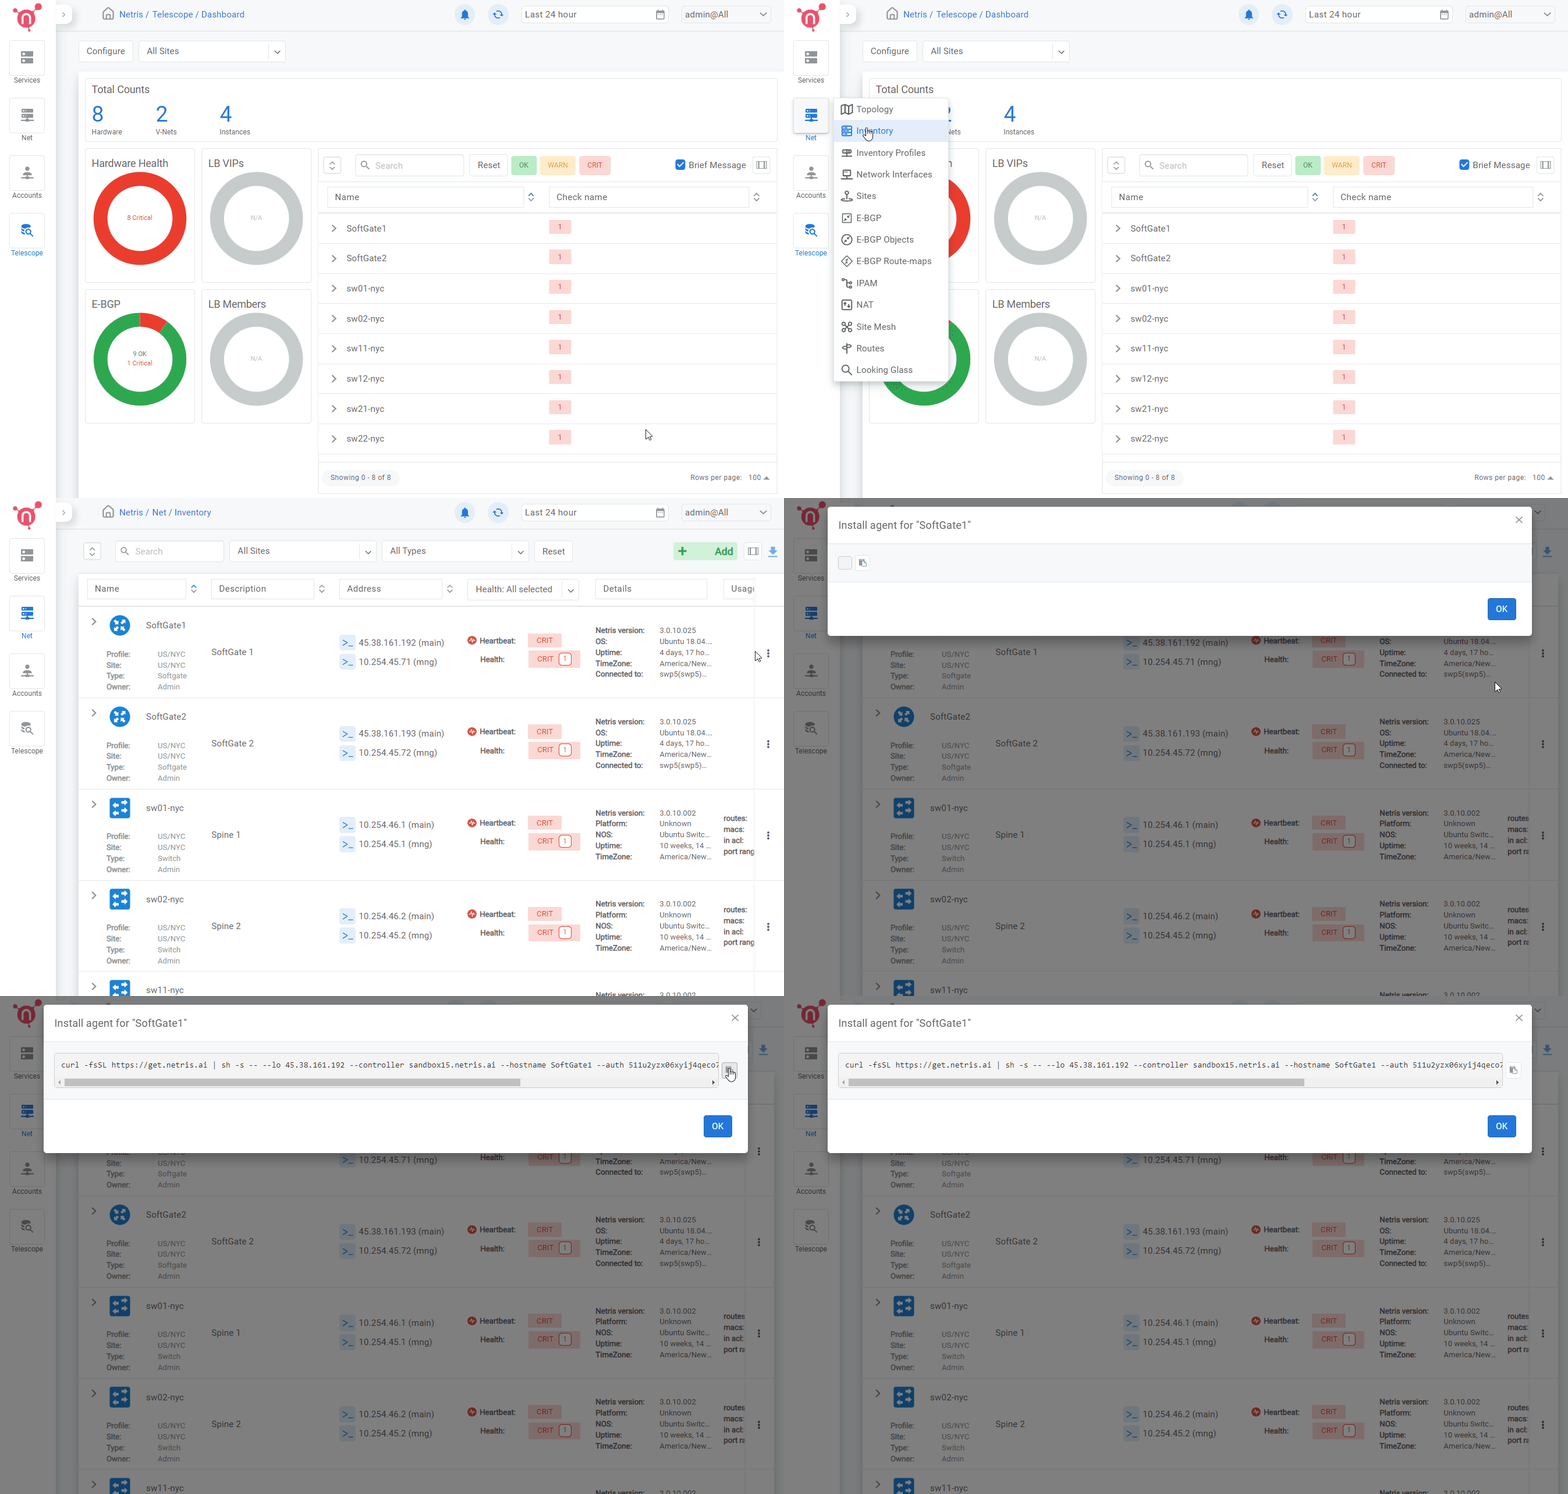
Upgrade the switch & SoftGate agents by copying the one-liner from the “Install Agent” option of the device’s 3-dot menu found under the Network → Inventory section and pasting it into appropriate devices by SSHing to the corresponding device.
Note
These one-liners include a unique identifier for binding the physical device with the virtual object in the Controller. Please make sure to copy/paste into the right devices.

After all the agents have finished the upgrade process, make sure all devices in the Network → Inventory section have a “green” status and the Netris version for each device reflects the version change.
In the event the “check_agent” status is “Agent is unavailable” after the agent upgrade has finished, perform agent restart on the affected device(s).
For Switches:
SSH to the switch and run the following command:
sudo systemctl restart netris-sw
For SoftGate nodes:
SSH to the SoftGate and run the following command:
sudo systemctl restart netris-sg
Rollback Procedure
A rollback procedure can be executed in the event the upgrade introduces any adverse impact on the production traffic.
Stop Netris Agents
Stop all Netris agents on the devices managed by the controller (switch & SoftGate).
For Switches:
SSH to the switch and run the following command:
sudo systemctl stop netris-sw
For SoftGate nodes:
SSH to the SoftGate and run the following command:
sudo systemctl stop netris-sg
Restore The Database
Restore the database from the previously taken snapshot.
Drop the current database and create a new one by running the following command after SSHing to the Controller:
kubectl -n netris-controller exec -it netris-controller-mariadb-0 -- bash -c 'mysql -u root -p${MARIADB_ROOT_PASSWORD} -e "DROP DATABASE $MARIADB_DATABASE"'
kubectl -n netris-controller exec -it netris-controller-mariadb-0 -- bash -c 'mysql -u root -p${MARIADB_ROOT_PASSWORD} -e "CREATE DATABASE $MARIADB_DATABASE"'
While still connected to the Controller, copy the backup file from the controller host system to the MariaDB container and restore the database:
kubectl -n netris-controller cp db-snapshot.sql netris-controller-mariadb-0:/opt/db-snapshot.sql
kubectl -n netris-controller exec -it netris-controller-mariadb-0 -- bash -c 'mysql -u root -p${MARIADB_ROOT_PASSWORD} $MARIADB_DATABASE < /opt/db-snapshot.sql'
Downgrade the Controller Software
Downgrade Netris Controller application with the following command.
Note
For the version number, use the number collected from step #3 during the upgrade procedure.
Example:
curl -sfL https://get.netris.io | sh -s -- --ctl-version 3.0.10-031
Afterwards, verify that the version of the “Netris Version” reflects the downgraded version by navigating to Settings → General in the Netris Controller.
Downgrade Netris Agent Software
Once you have verified that the Netris controller has been downgraded to the correct version, it is time to downgrade the switch and SoftGate agents.
Install the appropriate version of switch & SoftGate agents by copying the one-liner from the “Install Agent” option of the device’s 3-dot menu found under the Network → Inventory section and pasting it into appropriate devices by SSHing to the corresponding device.
Note
One-liners include a unique identifier for binding the physical device with the virtual object in the Controller. Please make sure to copy/paste into the right devices.
After all the switches and SoftGates have been successfully downgraded, make sure all the devices in the Network → Inventory section have a “green” status and the Netris version for each device reflects the version downgrade.
In case the “check_agent” status is “Agent is unavailable” after agent downgrade, perform agent restart.
For Switches:
SSH to the switch and run the following command:
sudo systemctl restart netris-sw
For SoftGate nodes:
SSH to the SoftGate and run the following command:
sudo systemctl restart netris-sg
