 Join Slack
IPAM Setup for Services
To take advantage of the services provided by Netris, it is imperative to define Allocations/Subnets within the Netris IPAM. The Netris Controller comes with predefined subnets that serve the purpose of “common” and these subnets can be used to create V-Nets. However, to leverage services like NAT/L4 (elastic) Load Balancer, it is essential to create new Allocations and Subnets that align with the appropriate purpose. Alternatively, if an existing predefined subnet satisfies the requirements of your network architecture, it is possible to reconfigure it with the desired purpose.
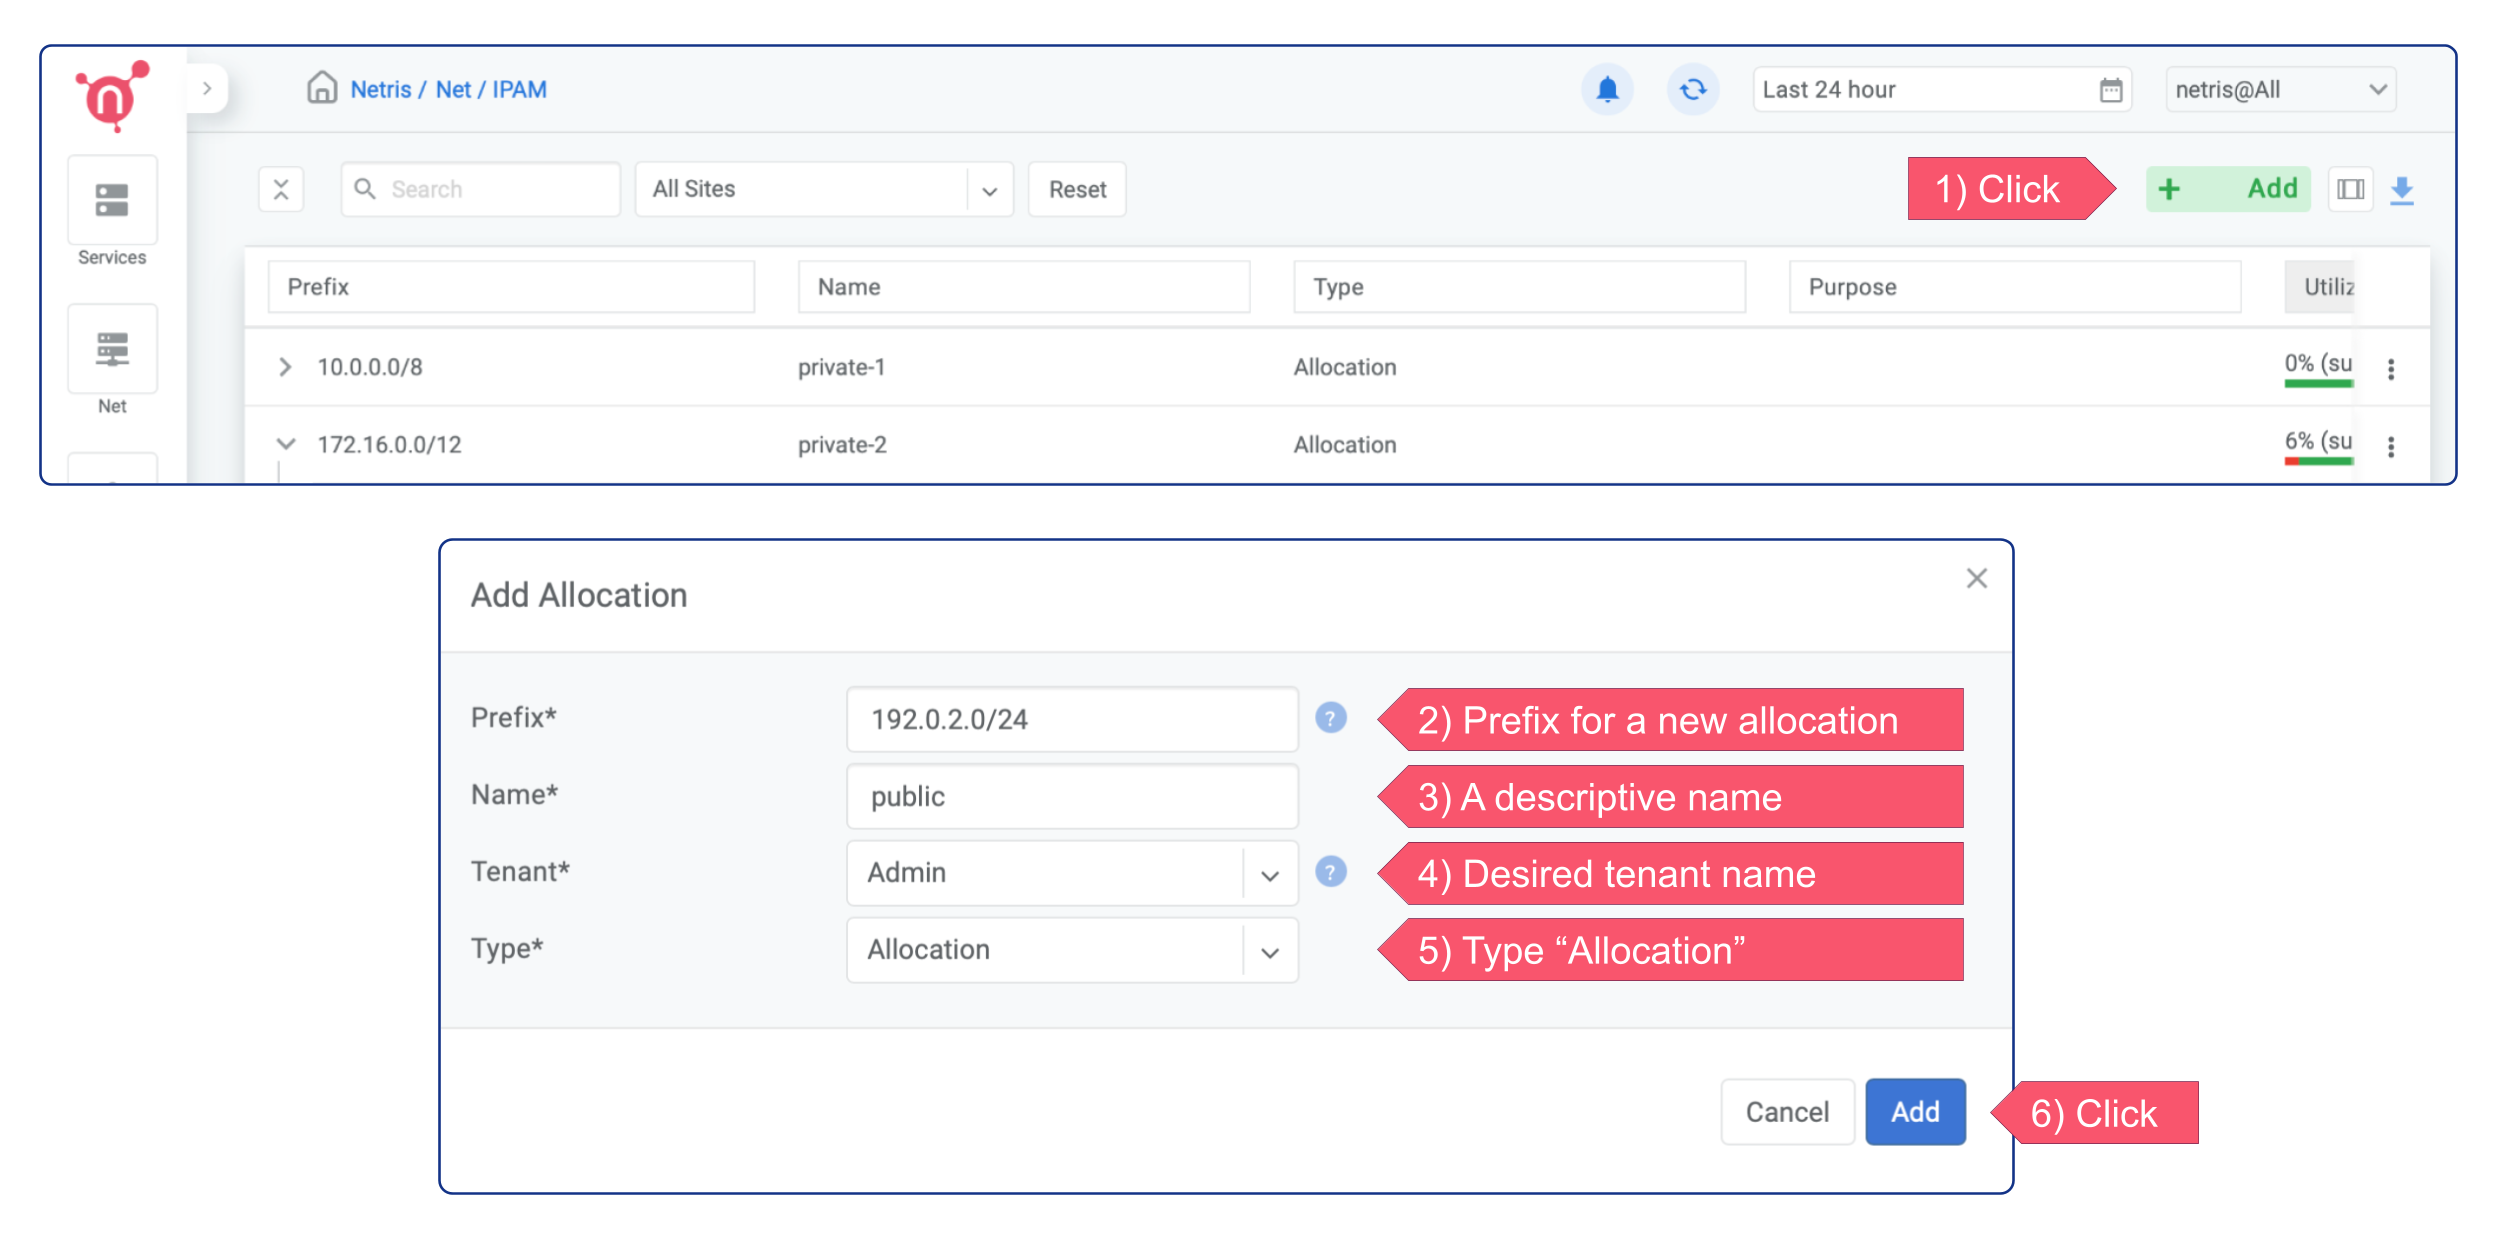
Create an allocation
In addition to the predefined subnets, the Netris Controller also includes predefined allocations, consisting of private IP addresses defined in RFC 1918 - 10.0.0.0/8, 172.16.0.0/12, and 192.168.0.0/16. If you intend to create subnets that fall outside of these predefined allocations, you must first create allocations that encompass those subnets.
Enable on-demand L4 (elastic) Load Balancer
Once the allocation is created, you can proceed with creating a subnet with the purpose of “load-balancer”.
Click the + Add button in the top right corner, type a “Prefix” for a new subnet, type a descriptive “Name” for it, select the desired tenant name from the dropdown menu next to the “Tenant” field, select “Subnet” from the “Type” dropdown menu, select “load-balancer” from the “Purpose” dropdown menu, and select the appropriate site from the “Sites” dropdown menu.
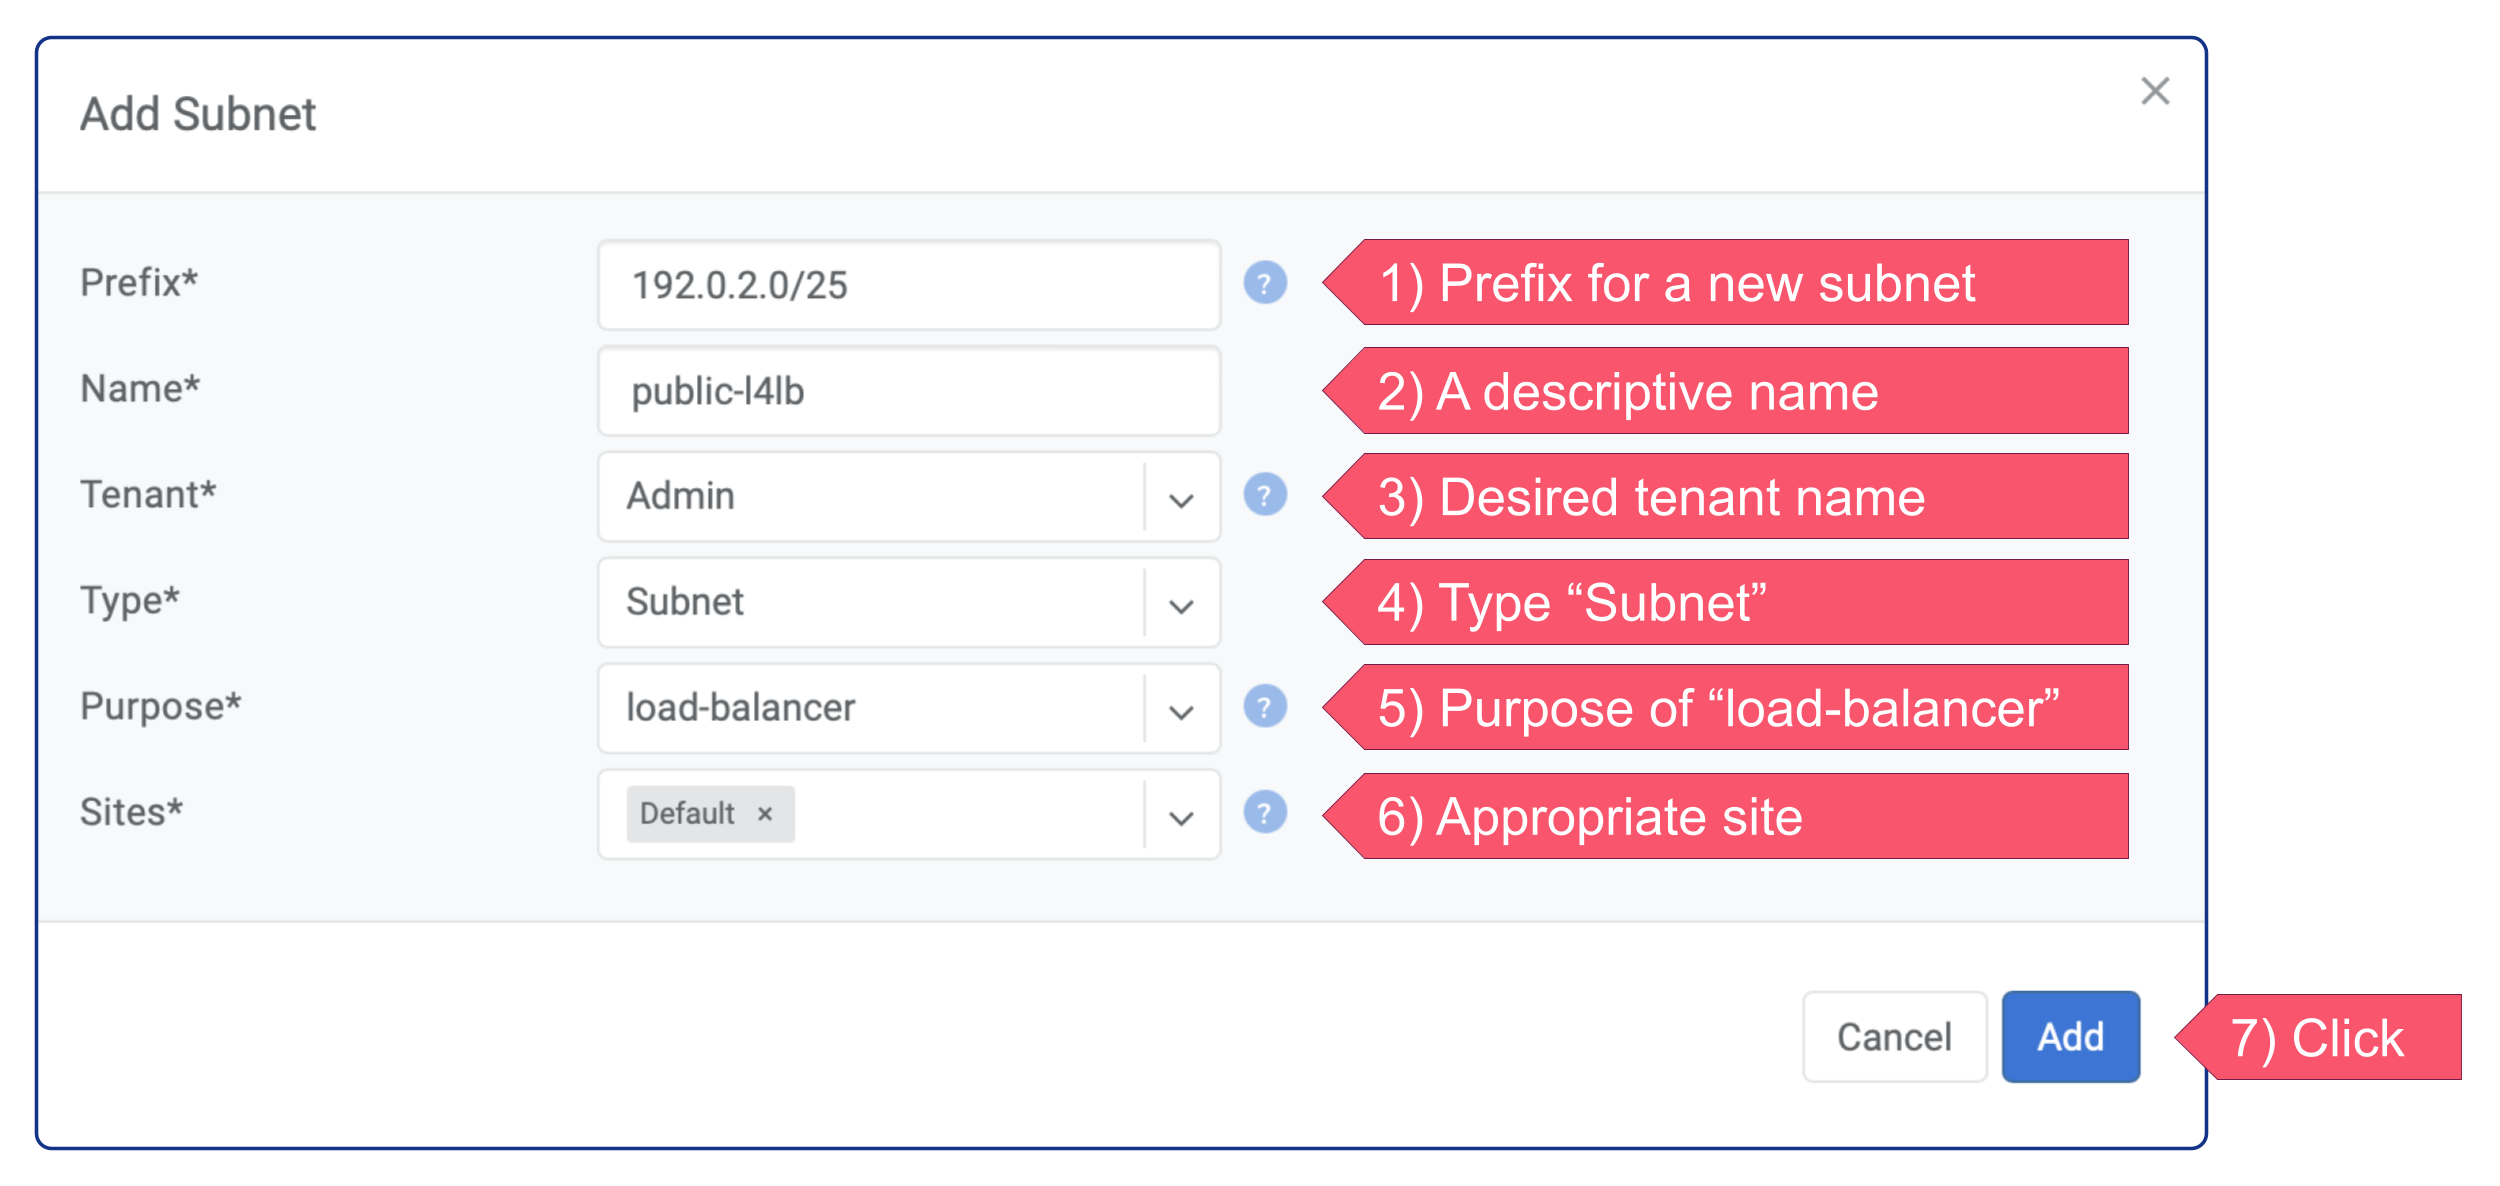
The on-demand L4 (elastic) Load Balancer service has been successfully activated and can be accessed through either the web console or Kubernetes using a service of the type load-balancer, or with Terraform.
It is worth noting that in the example provided, the Tenant field was left at its default setting of “Admin.” Tenancy is a feature that enables role-based access control and resource delegation. To illustrate, you may want to establish a user role and tenant for your colleagues who are meant to consume Netris VPC services but are not authorized to administer them.
Enable Network Address Translation (NAT)
To enable NAT, you need to create a subnet with the purpose of “nat”.
Click the + Add button in the top right corner, type a “Prefix” for a new subnet, type a descriptive “Name” for it, select the desired tenant name from the dropdown menu next to the “Tenant” field, select “Subnet” from the “Type” dropdown menu, select “nat” from the “Purpose” dropdown menu, and select the appropriate site from the “Sites” dropdown menu.
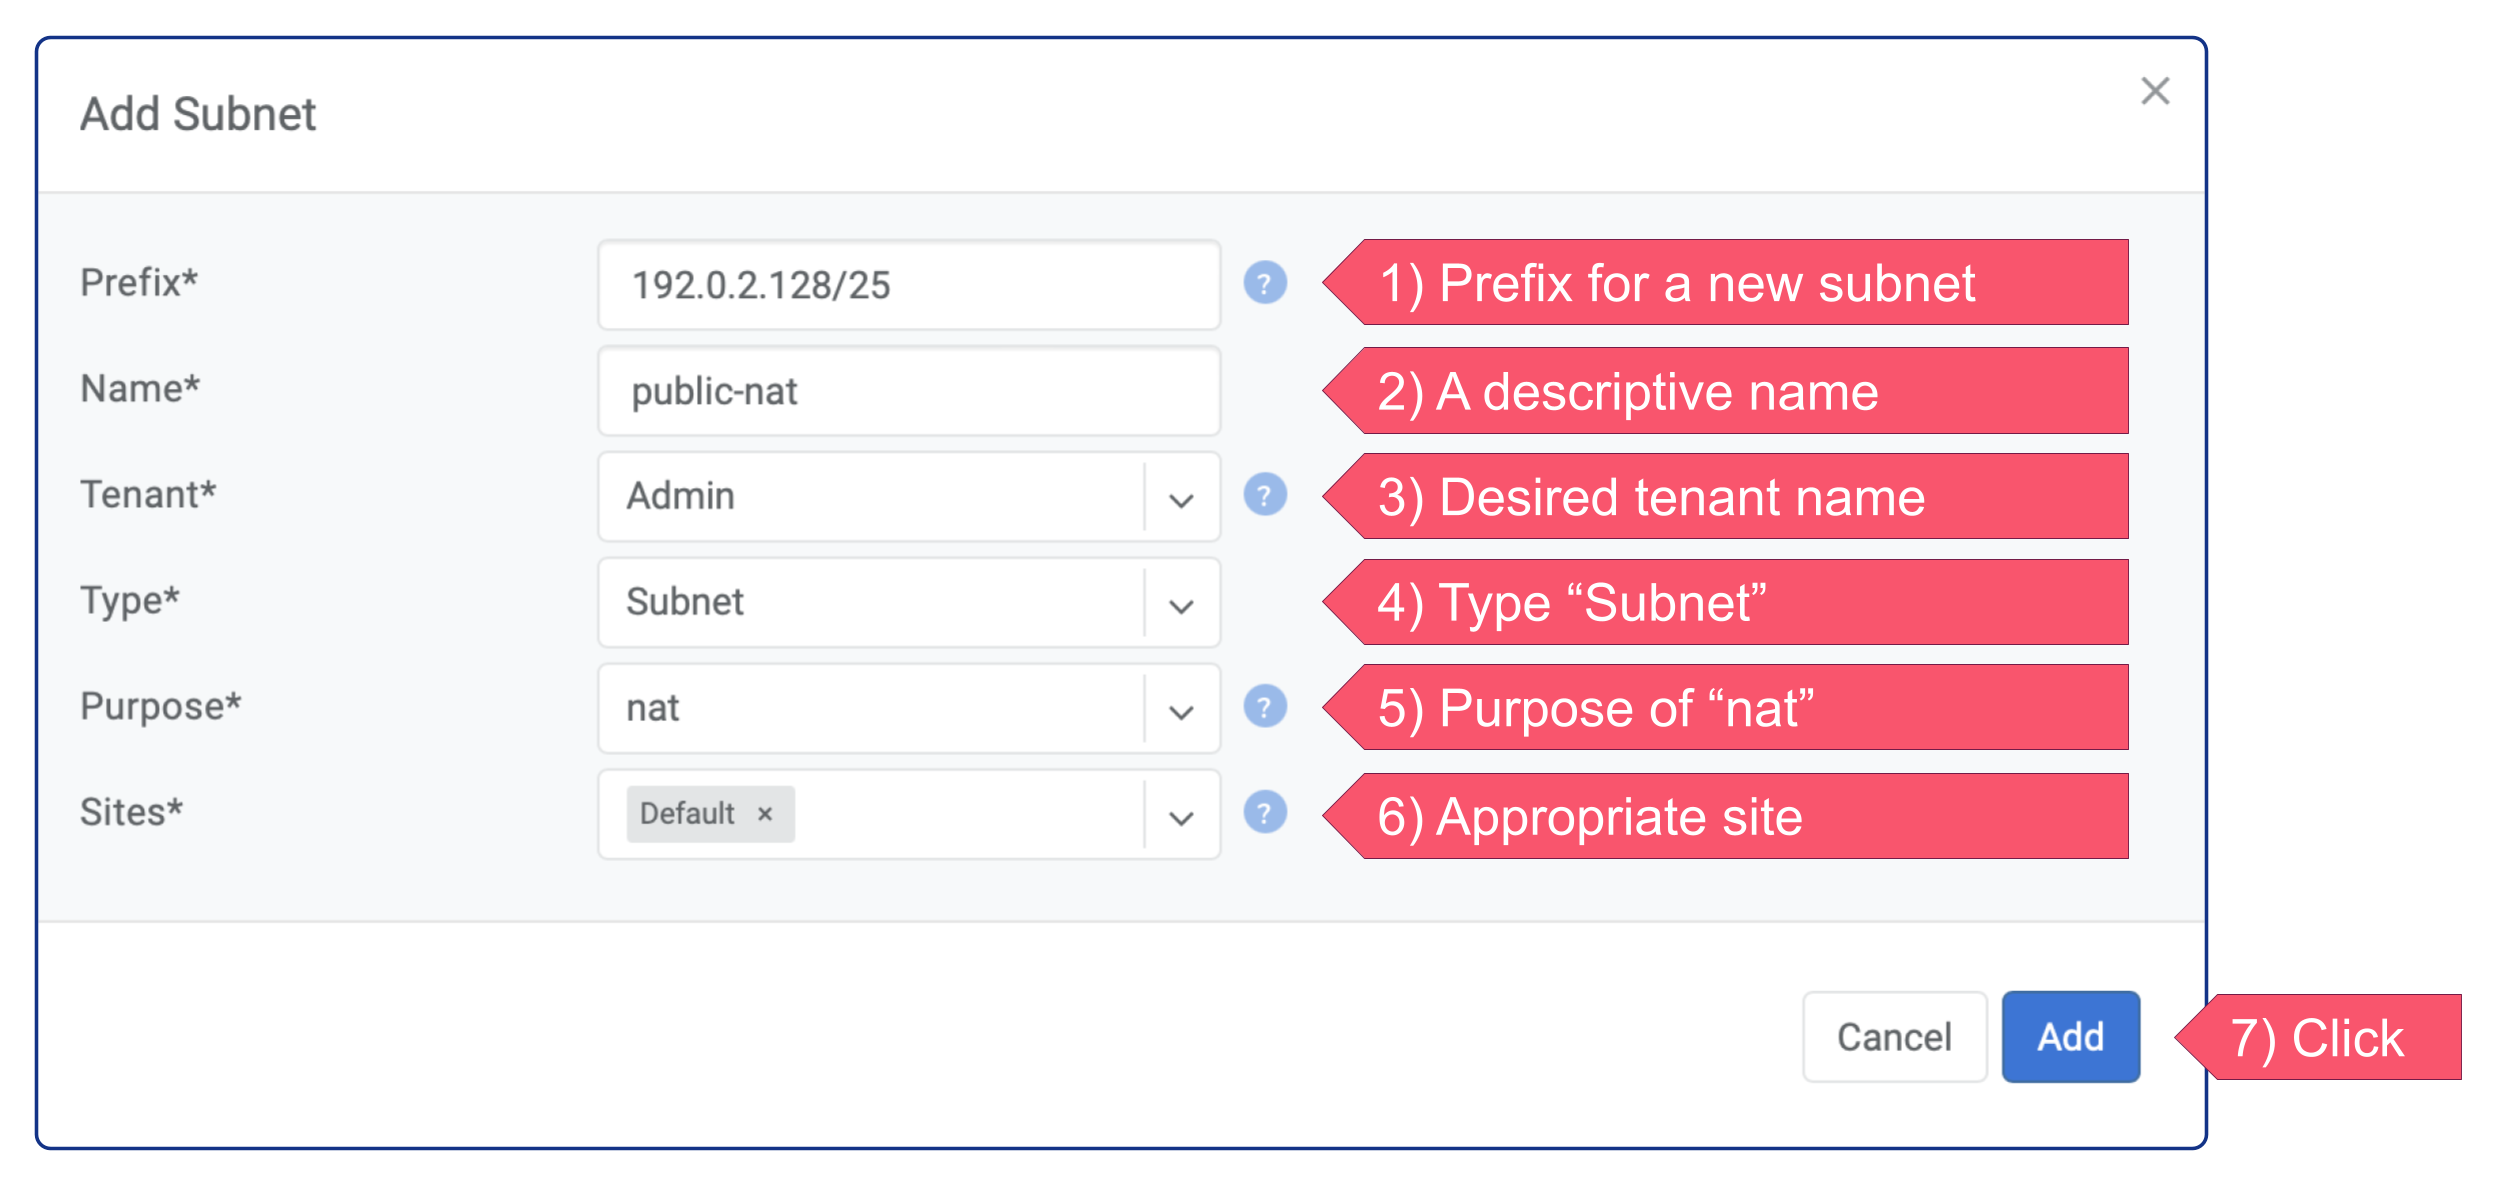
The NAT service has been successfully activated. To create a NAT rule, navigate to the Net → NAT section of the Netris web console. Netris supports most standard SNAT and DNAT rules.