Enabling services (NAT, V-Net, Load Balancer, IP pools)
Although bare metal servers in Equinix Metal Project get a public IP address and can access the Internet, it’s not the case with the VMs. When you use server virtualization something needs to be the gateway for your virtual networks. That gateway will provide packet forwarding with access control between your virtual private networks, will provide NAT, and on-demand (Elastic) Load Balancer services. Physically that gateway is Netris SoftGate. And it operates automatically, providing you with the VPC-like networking capabilities.
Both NAT and on-demand Load Balancer services need public IP addresses.
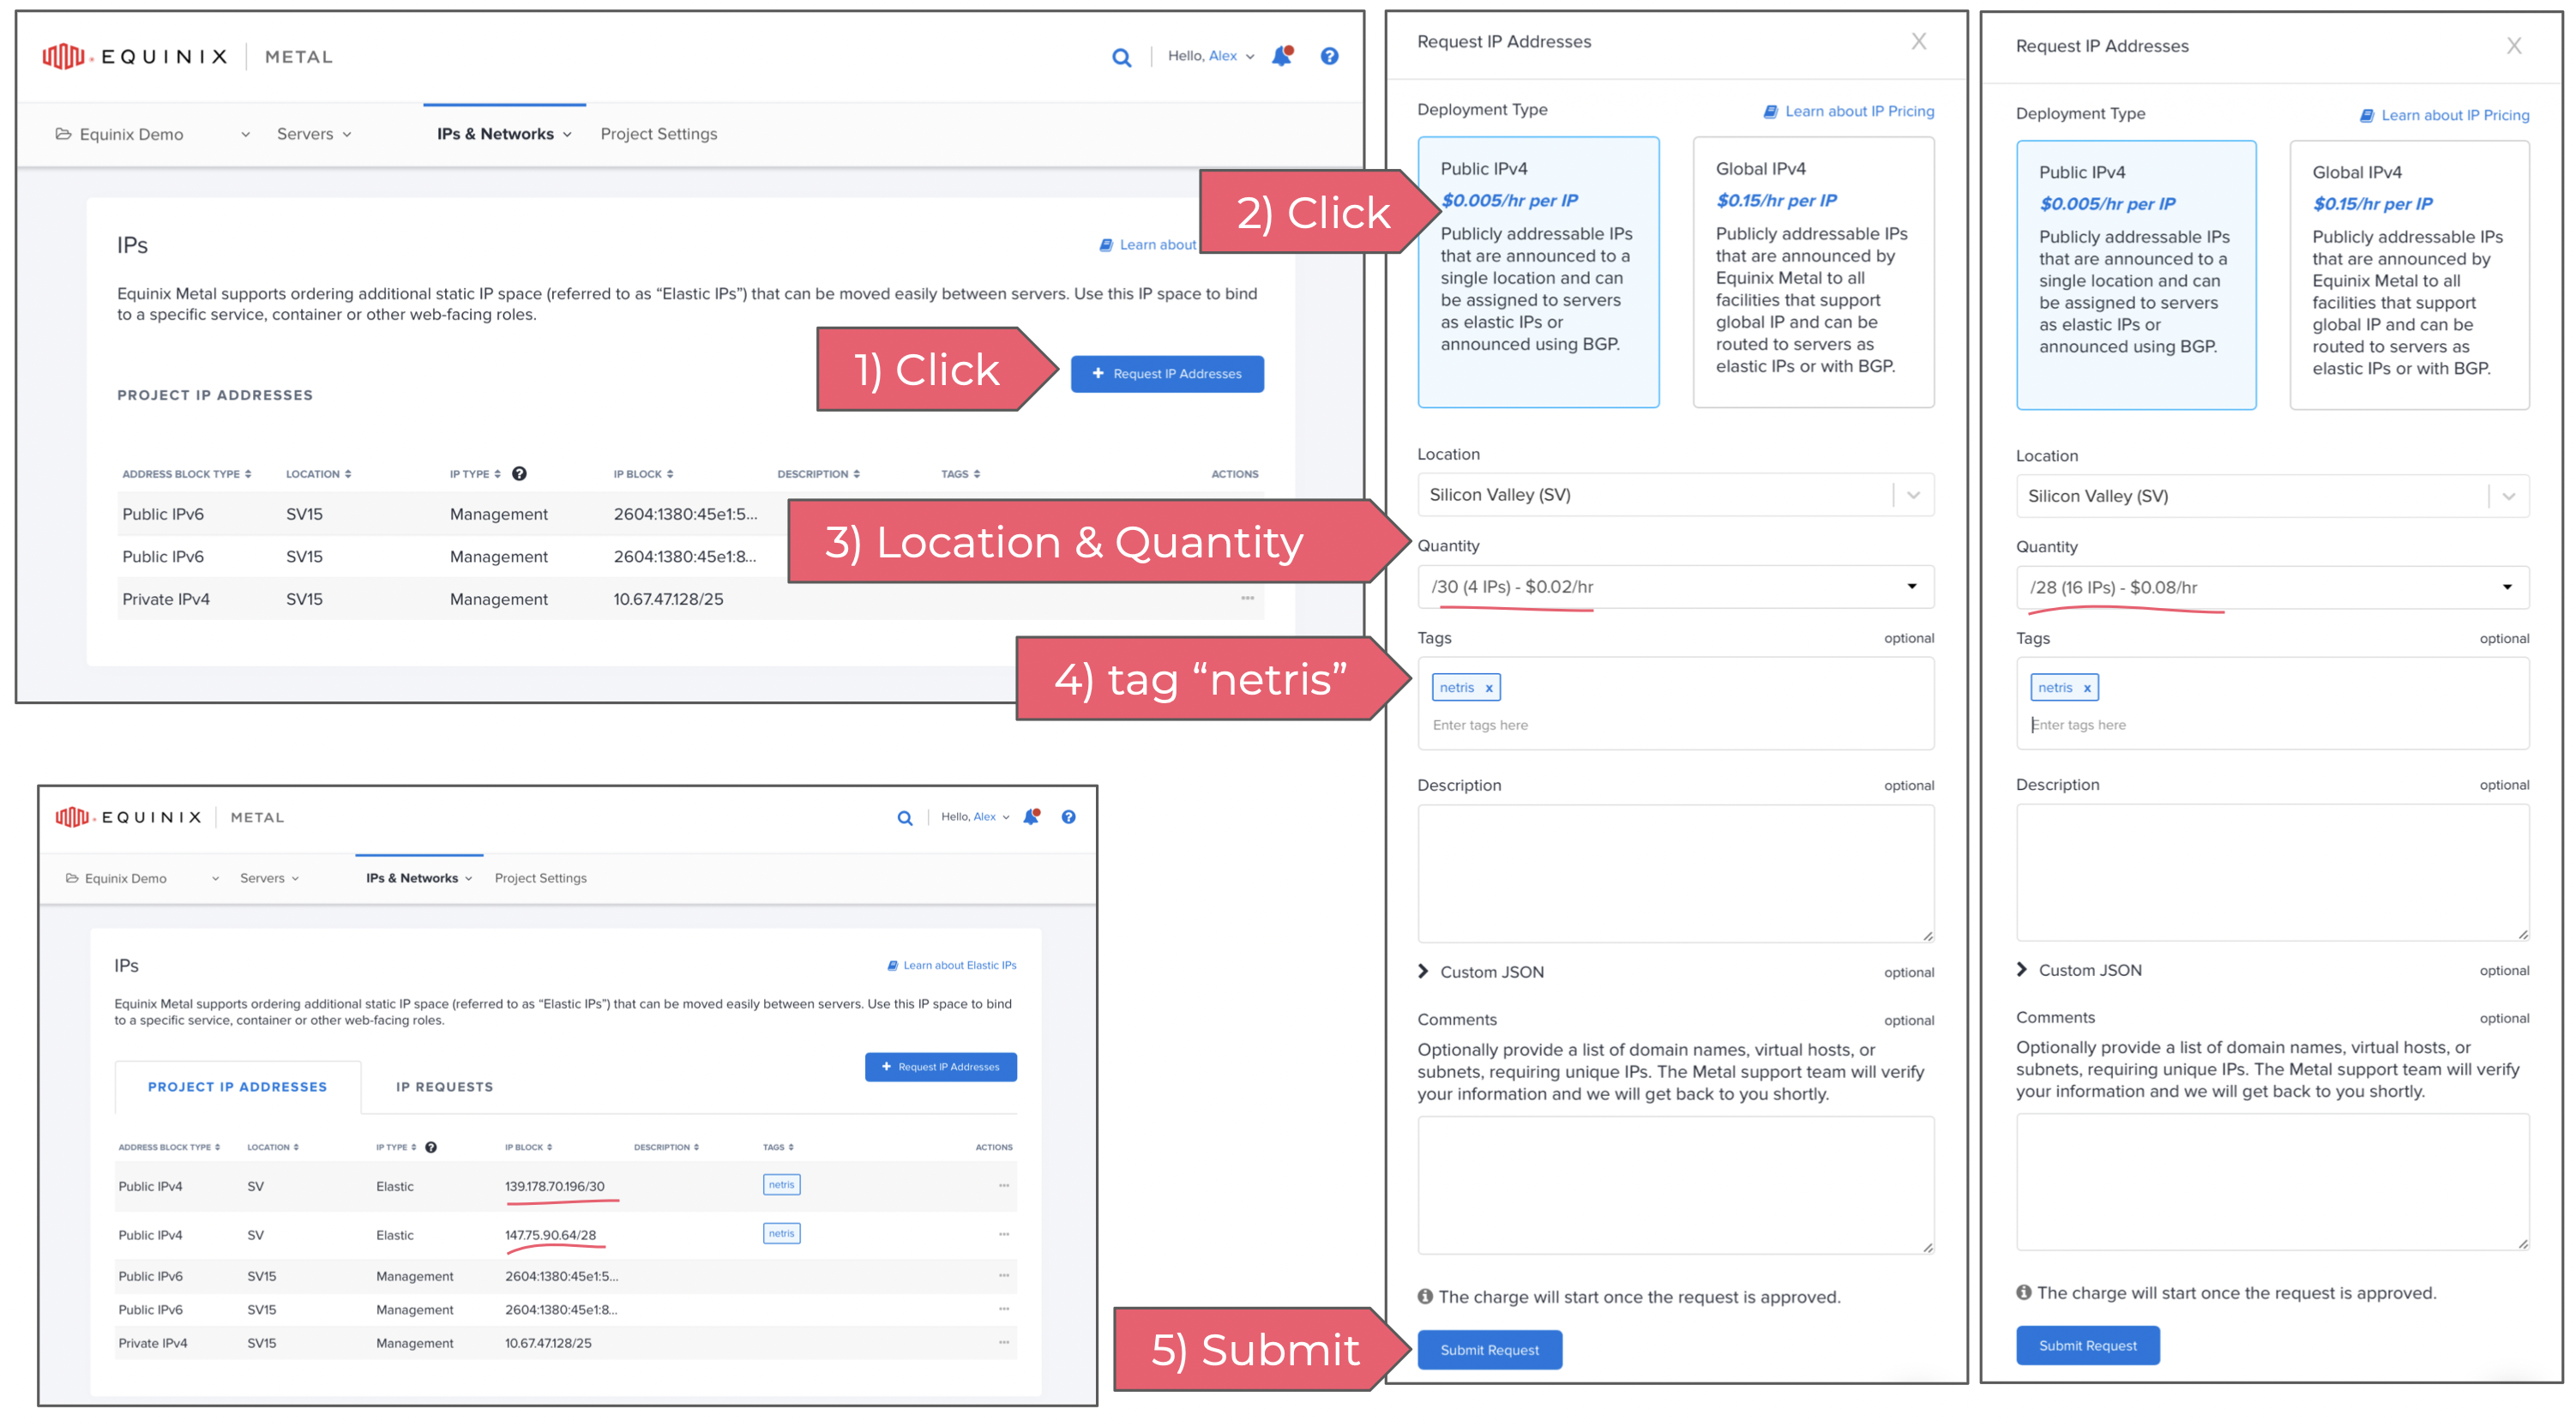
1) Requesting new Public IP address block
Go to Equinix Metal web console and click on IPs & Networks → IPs (see the screenshot below)
In this example, I’m requesting two IP address blocks, one /30 (4 IPs) for NAT and one /28 (16 IPs) for Load Balancer.
It’s important to tag IP blocks as “netris”. This is a signal for Netris Controller that this block is intended for Netris VPC.
You can always request more IP address blocks in the future. Also it is possible to request a large block and then use Netris IPAM for crushing it into smaller blocks. You can read more about Netris IPAM in Netris docs.
Once IP address blocks are provisioned on Equinix Metal Project you should be able to find them automatically replicated in Netris web console under Net → IPAM
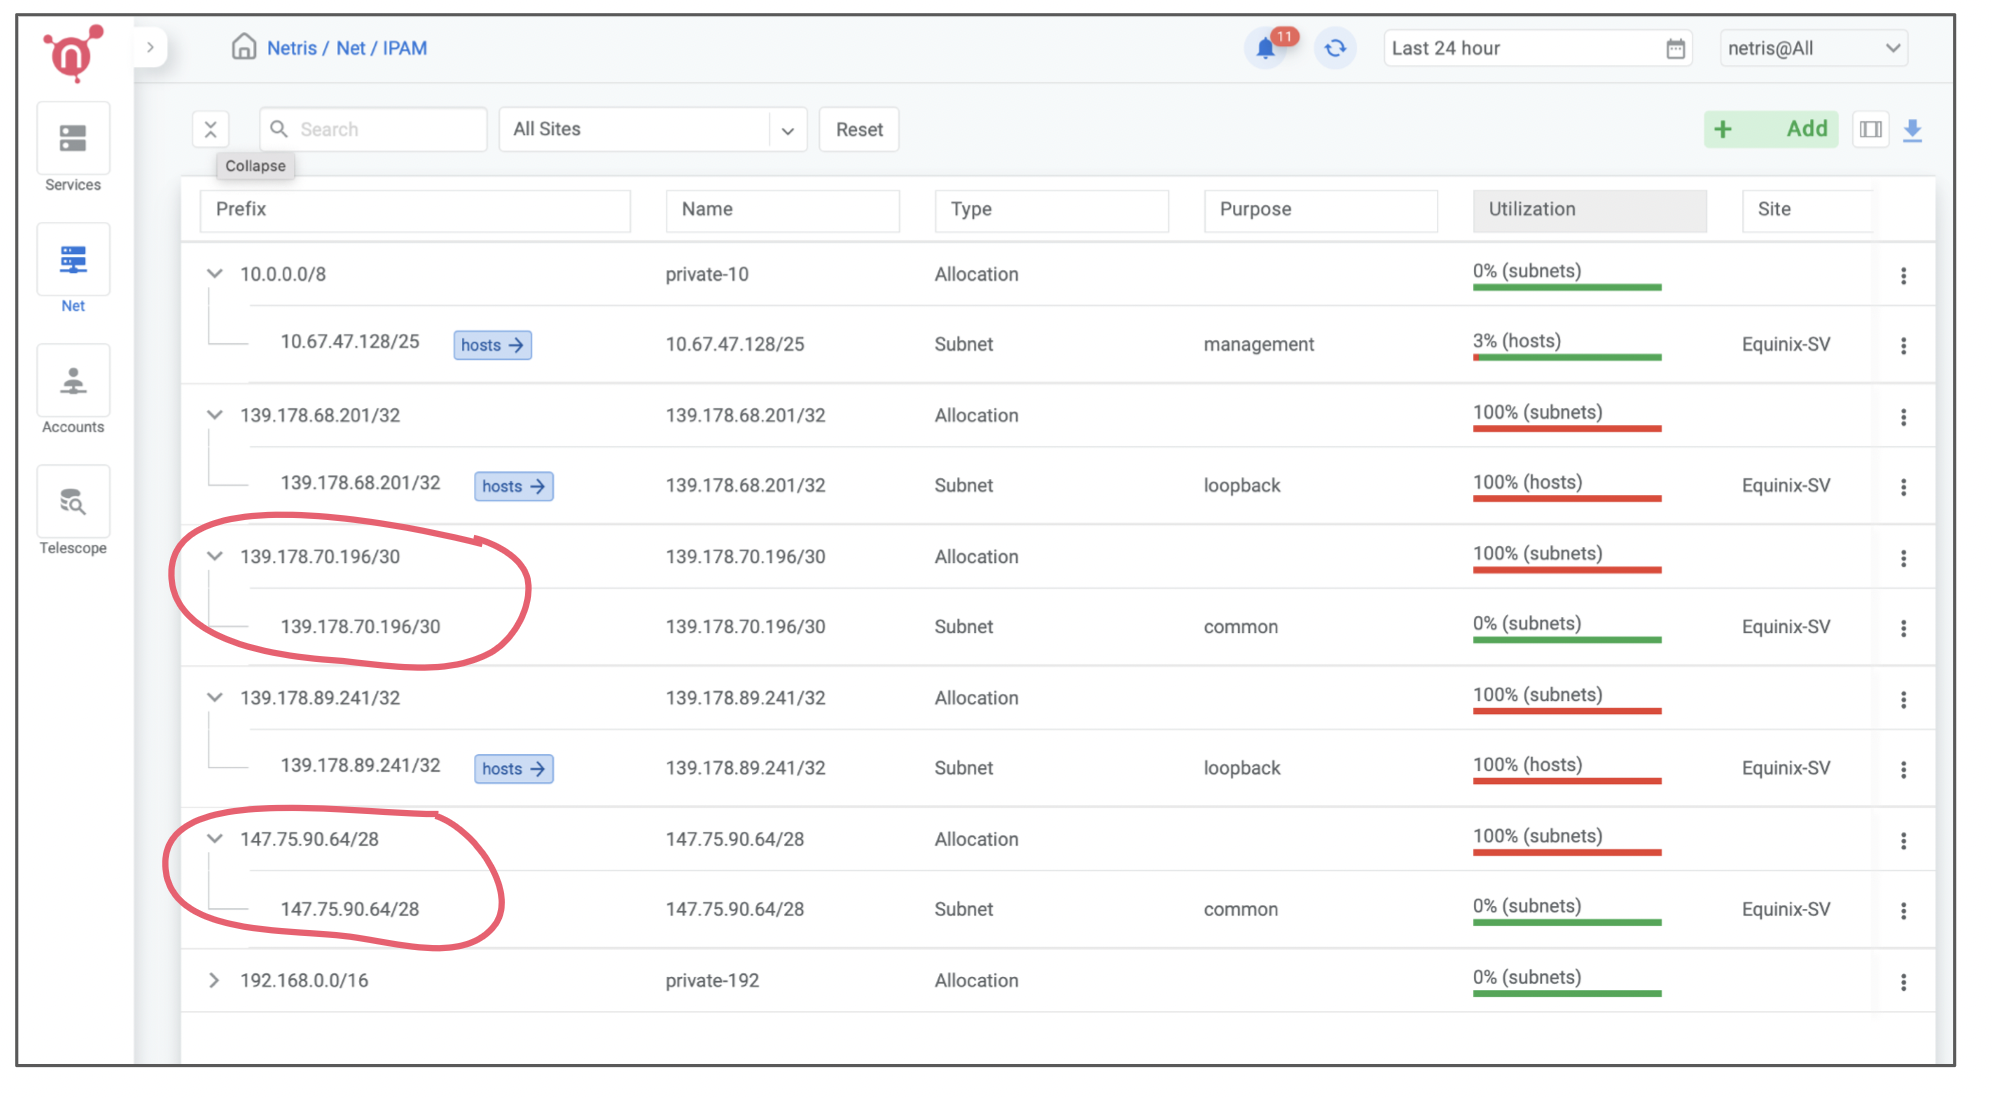
You don’t need to worry about advertising them over BGP, Netris will handle that automatically when that makes sense (associated with any service).
2) Enable on-demand (elastic) Load Balancer
To Enable on-demand (elastic) Load Balancer you only need to change the “purpose” field of appropriate IP address block from “common” into “load-balancer”
Click on the 3 dots menu (in this example of /28 IP address block), click edit, and select “load-balancer” from the dropdown menu next to the “purpose” field.
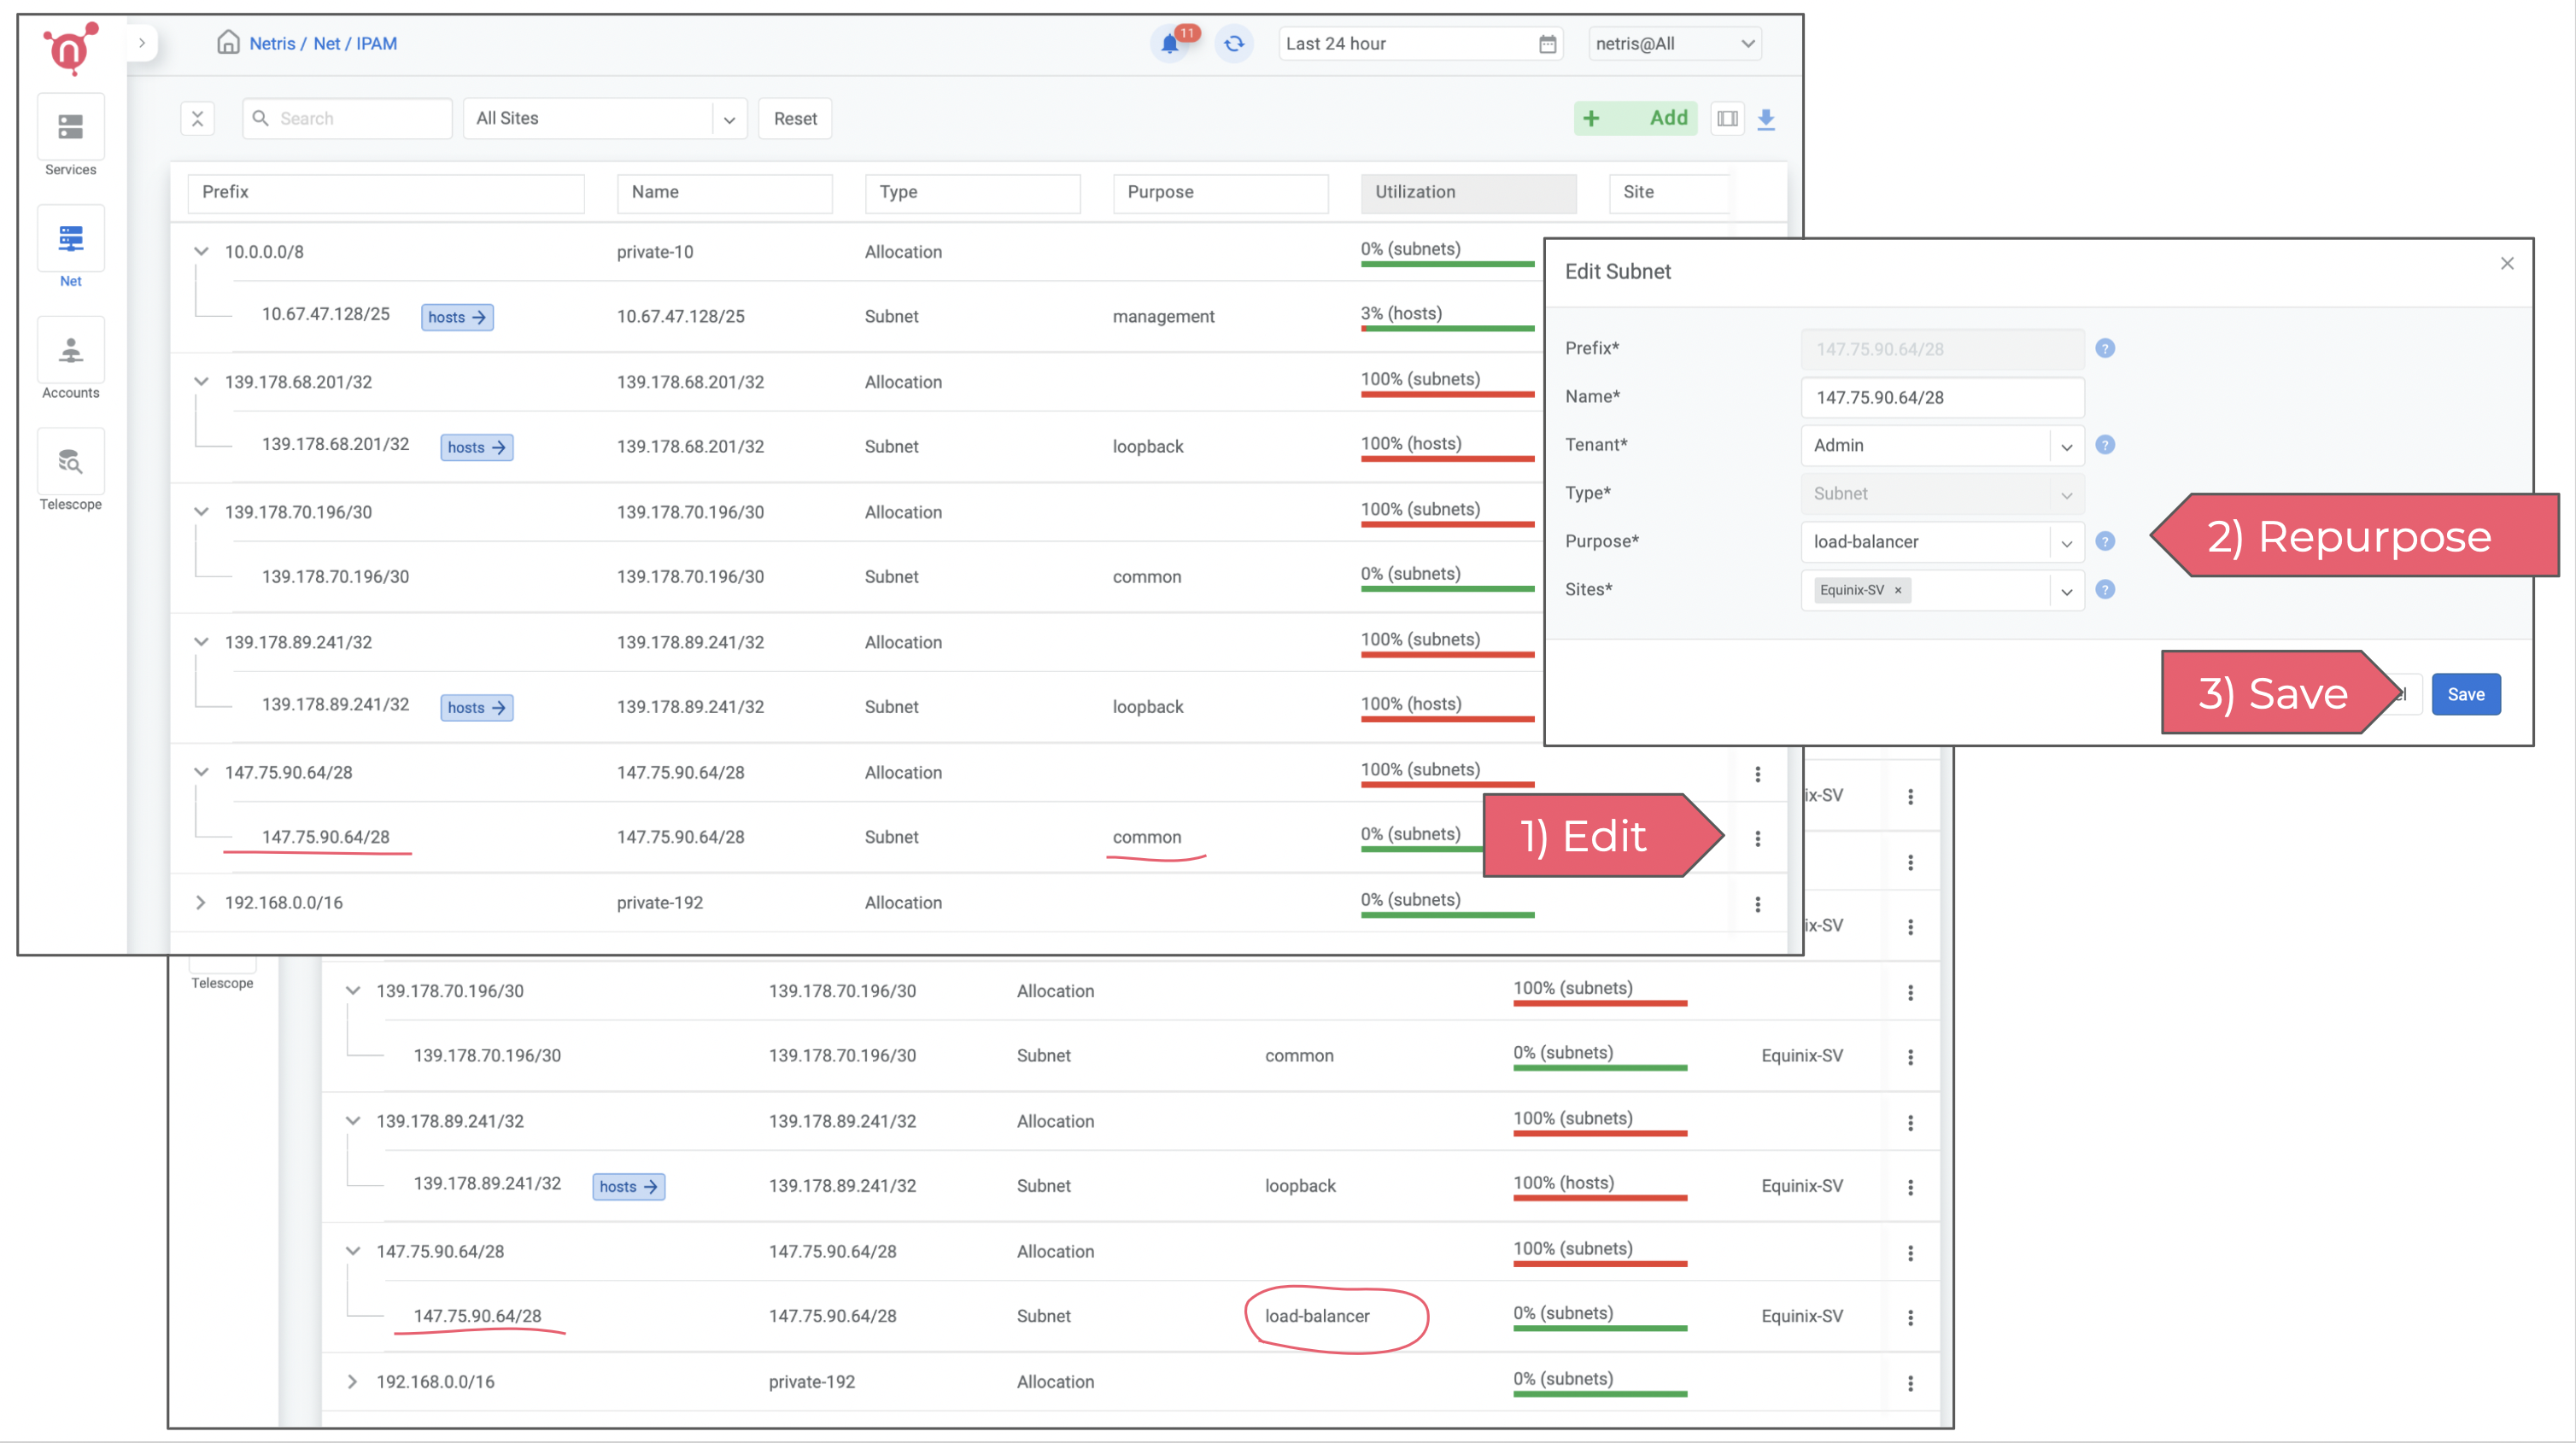
Now on-demand (elastic) load balancer service is enabled and can be consumed either from web console, or from Kubernetes using service of the type load-balancer, or with Terraform.
Please note that in this example we left the field Tenant set to Admin. Tenancy is used for role based access control and resource delegation. In other words you may want to create a user role and tenant for your colleagues that are supposed to consume Netris VPC services, but not administer it.
3) Enable V-Net
V-Net is a service for virtual private networks. You need to create a few subnets of private IP address blocks to be used by you and your colleagues later on for creating V-Nets. For now you can set the Tenant field to Admin, but in the future if you need to create a separate user role that should be able to consume Netris VPC but not administer it, you will need to create a separate Tenant and give that Tenant IP resources.

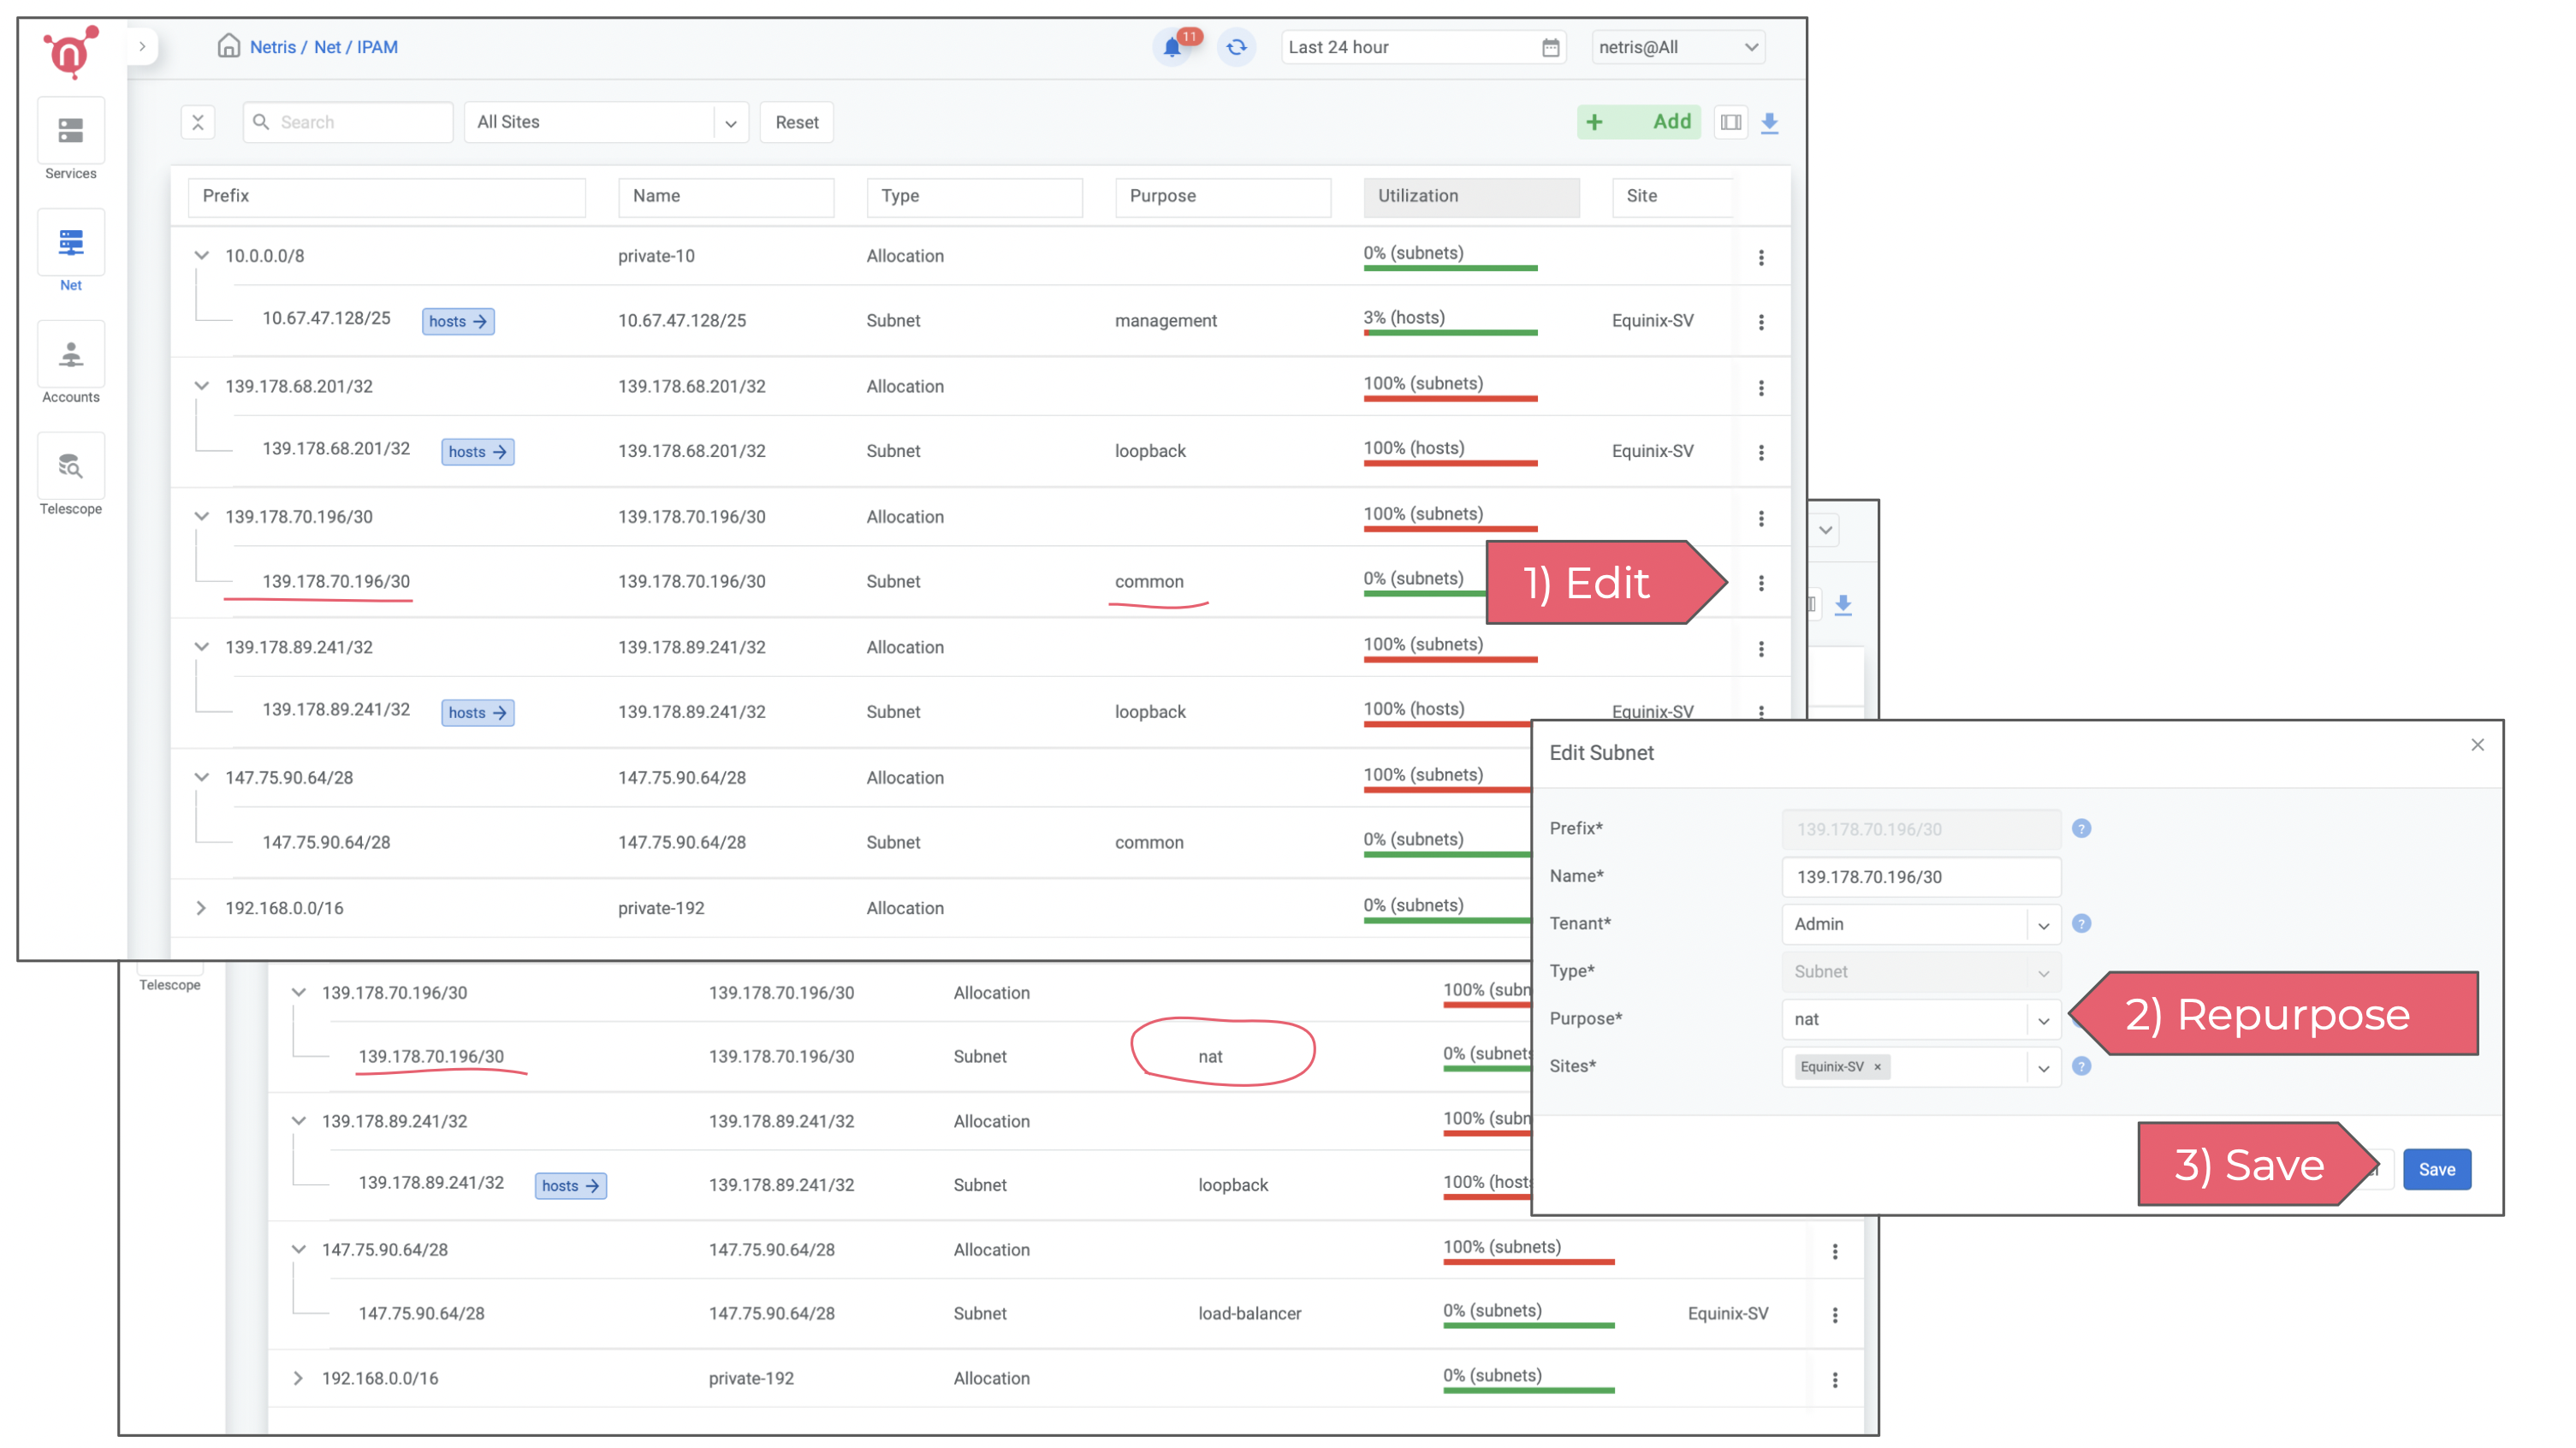
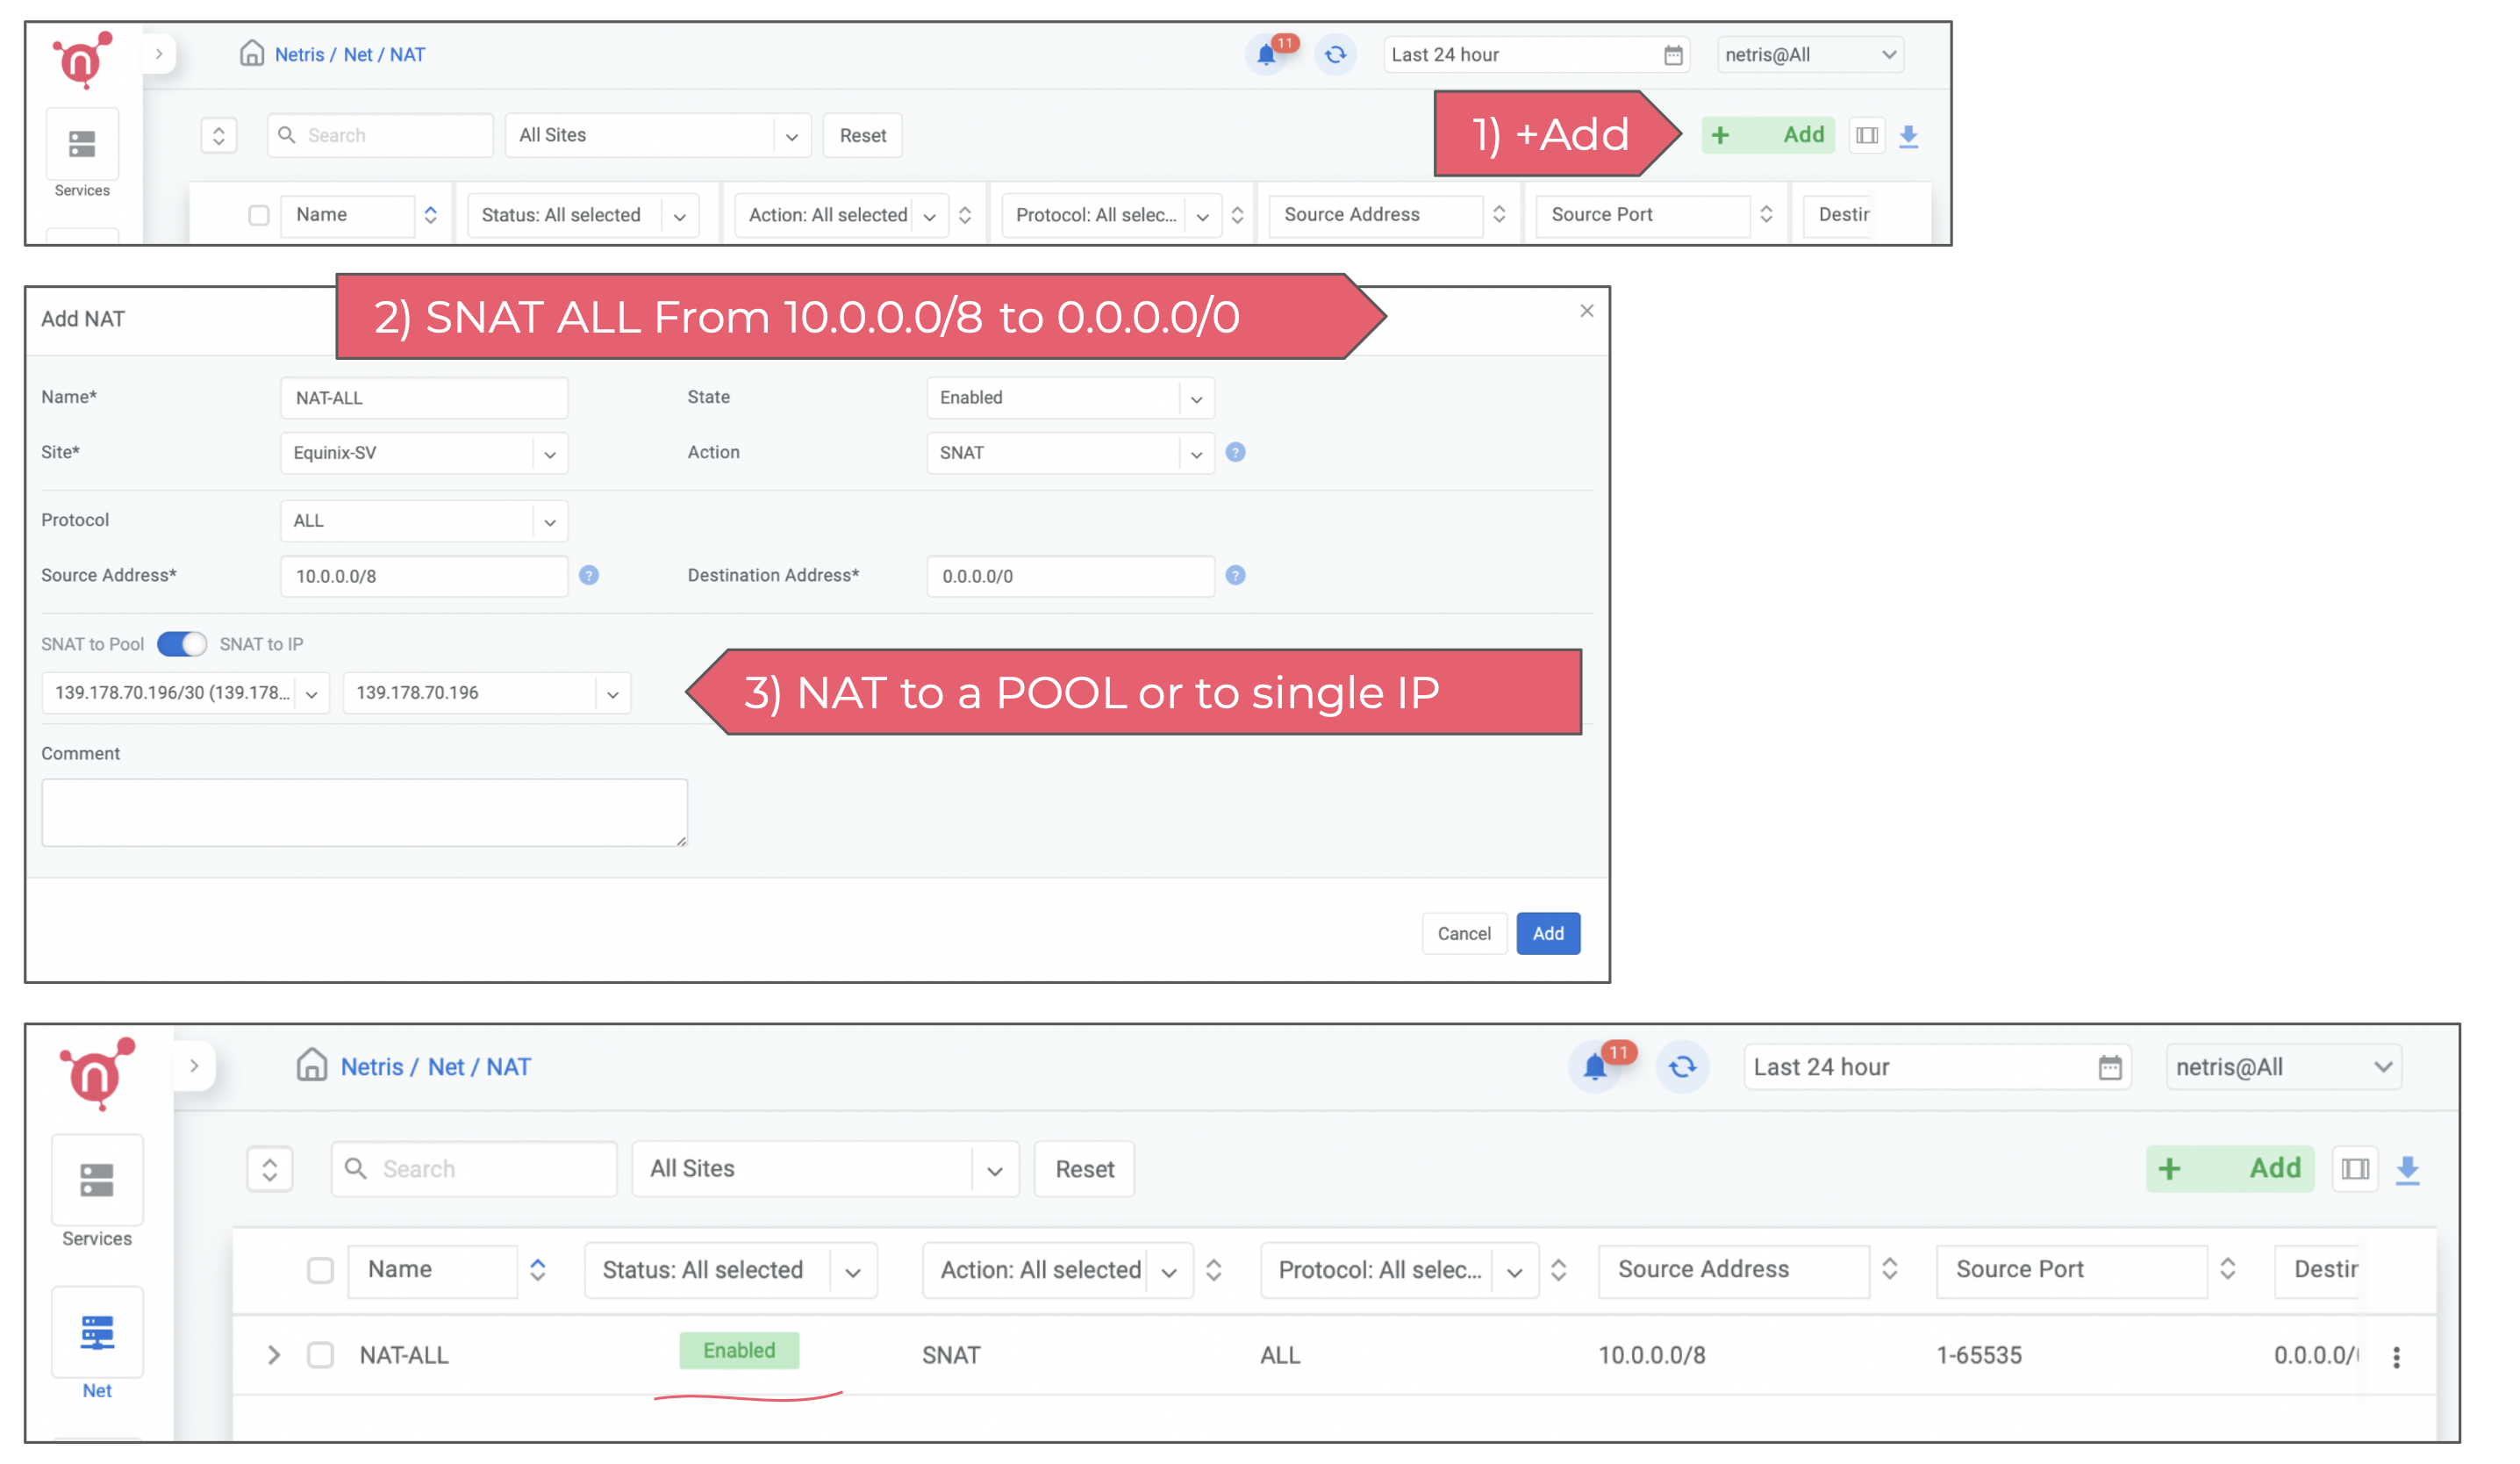
4) Enable NAT
To enable NAT, you need to repurpose a block of IP addresses for NAT. In the below example I’m repurposing the newly requested /30 subnet for NAT.
Then You need to create a NAT rule. In the Net → NAT section of Netris web console. Netris supports most of the standard rules for SNAT and DNAT. In this example I’m enabling SNAT for the entire 10.0.0.0/8 private network, so basically I just want to ensure that VMs that will get IPs from private networks will get outbound Internet access through NAT. You can always have more granular control either through NAT rule or using Services → ACLs.
At this point the minimal configuration of Netris VPC networking is done, next chapters will describe how to consume the VPC, how to request resources and services.